Sewn art

This title is a reference to a competition going on at Thread & Needles, a French sewing community (I know, why an English name if it’s a French community? Maybe because the girl who created it was a IT girl? ;p ). This is not my entry for the competition, but an old project that perfectly matched the competition theme. I thought it was a perfect excuse to take new pictures and share it! ;)

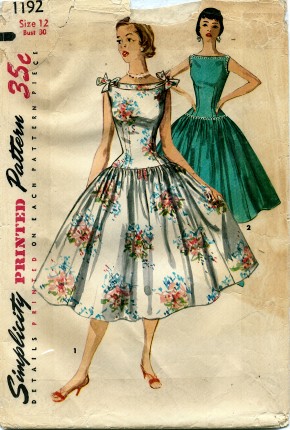
This dress was a gift from some of my friends for my 17th birthday. I had no idea at that time that I could learn sewing, but I did love to design and drawn garments. One of my friend’s mother knew how to sew, so there offered to custom make me a dress from one of my drawings. You can guess how happy I was.

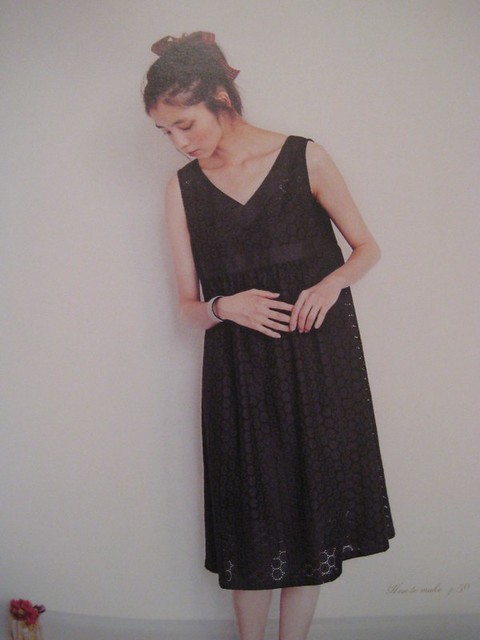
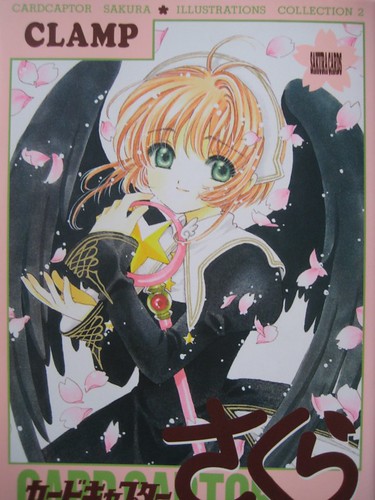
The lucky winner was a drawing of a dress inspired by an illustration by Clamp. It’s on the cover of the 2nd Card Captor Sakura art-book. The outfits from this series are really fun and original and I really liked this dress in particular. But since I wasn’t a child anymore and didn’t live in a manga, I had to make some changes.

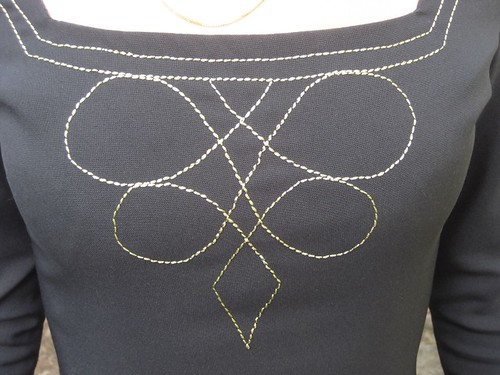
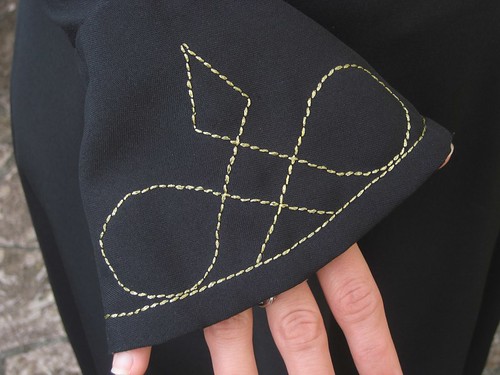
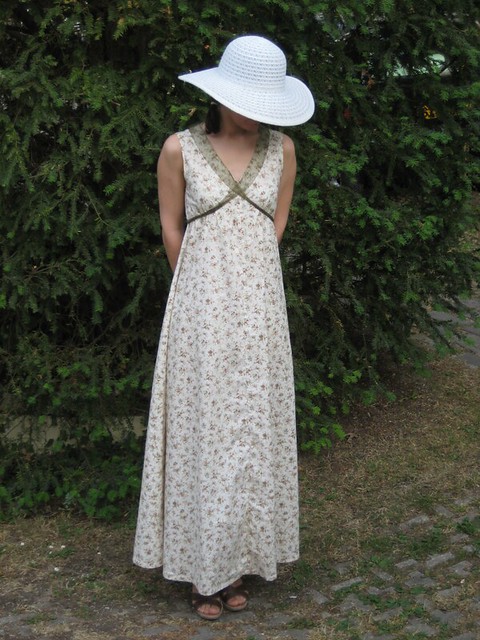
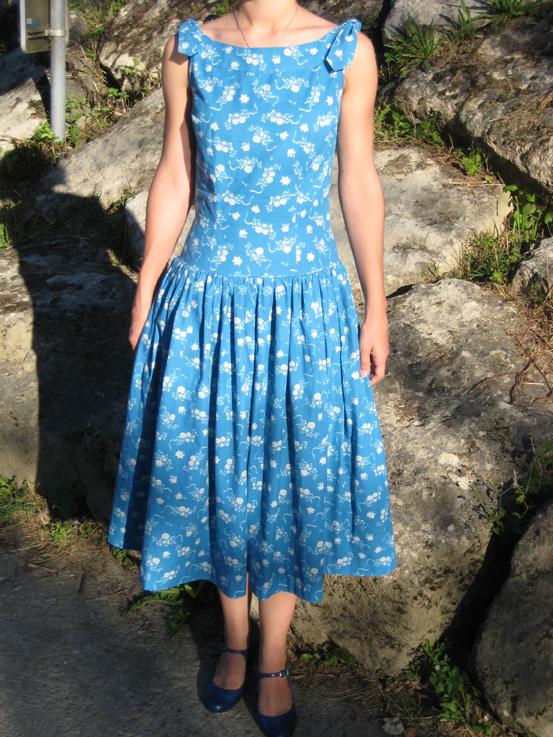
You can see the resulting dress is longer and simpler. We kept the style of the motifs but simplified them a little bit, as my friend’s mother had to embroider them by hand (I think she wasn’t too happy about it ^^; ). If I were to make it today I wouldn’t choose the same fabric, as it probably has a good deal of synthetic fiber, but it does hang nicely.

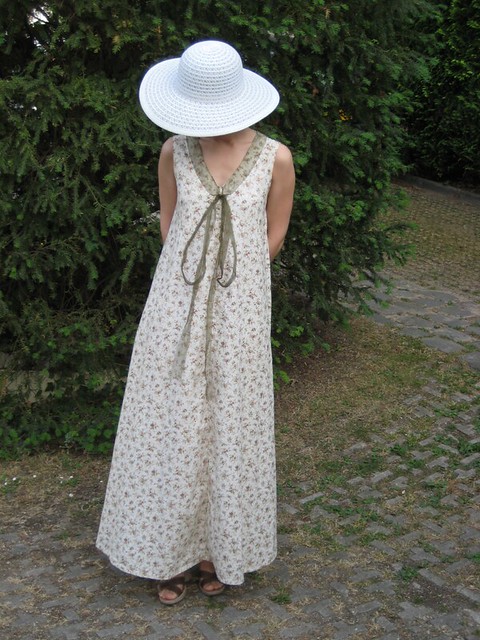
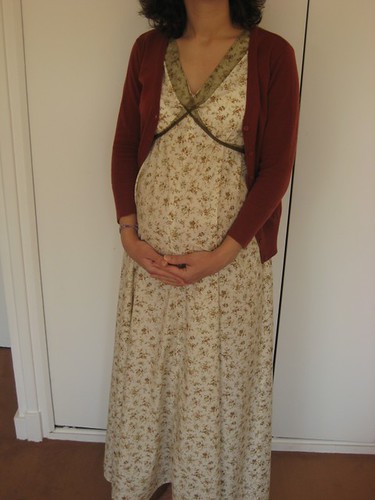
This dress was a favorite of mine for a long time, I wore it whenever I wanted to be nicely dresses and feel pretty. I have to admit it had been quite some time since I last wore it though. Putting it back on for the pictures made me want to wear it again. Sadly it’s a little bit tight around the arms now… I might try to let out the seams a bit and see if it solves the problem.


70′s dress from a japanese pattern

Do not forget the giveaway for La Modette’s fabric store, you have until tomorrow 10pm Paris time to enter (that’s 1pm pacific time I think)!

This dress was made a few year ago (I was still living in Japan!) and was never shown here, but I love it and with summer coming it’s a good time to finally share it. This project was born because we were invited to a “disco” themed party, which was a perfect excuse to finally make of those long and flowy dresses from the 70′s that I love. I browsed the web for inspiration (no Pinterest at the time, I had to save the pictures on my computer ;p ) and fell in love with this pattern drawing: McCall’s 4399.

I didn’t want to order a pattern, so the plan was to make a dress similar to the maxi shown on the cover, using a pattern I already owned as a base. I didn’t have any vintage pattern at the time in my collection. Instead I turned to my collection of japanese pattern books, and found that the top of the I dress from the Stylish Dress Book had a similar top that I could use.

I used a picture from the envelope back as my guide for fabric requirements and the overall shape of each pattern piece and I went modifying my pattern to get the dress I wanted. In the end only the shoulders and armholes of the original pattern remain untouched. XD I changed the neckline to lower it and added lots of length to the top. The original pattern has a seam under the bust with a gathered skirt, mine doesn’t have any horizontal seam. However there are seams down the center front and center back since the botom of the dress was to wide for my fabric width. I was planning to add sleeves, but left them of at the last minute because of a lack of time. I did like the dress as it was so I left it like this.

I used a floral cotton fabric that wasn’t probably the best choice in terms of thickness and drape (it probably is light quilting cotton) but that I thought was nice in terms of print. Plus I didn’t have much time so I had to do with what I could find around me. Because of that fabric it might not be as flowy as it could be, and it’s not as light as I wished it was during very hot summer days, but I wear it all the same. I wear it every summer since I made it. For the neckline ribbon the pattern calls for “stretch lace or foldover flexi-lace”. I couldn’t find any so I used a sort of gauzy ribbon. Since it couldn’t follow the round neckline at the back I slightly gathered it. Now I think it wasn’t the best idea, but I’m too lazy to change that… ^^; If I make it again I’ll probably cut a fabric band the same shape of the dress neckline (kind of like a facing).

The funny thing is that this particular pattern is for a maternity dress. Of course I wasn’t pregnant at the time but I didn’t mind and I don’t think the resulting dress screams “maternity”. But I was super happy to have it when I was indeed pregnant last year. :) It was indeed perfect, as you can see in the following pictures.

Overall I’m quite happy with this dress. I love that it is quite comfortable because of the tent shape (I can even tie the ribbon at the front to remove the empire waist) but still feels feminin. Sure it has flaws but at the time I made it I didn’t have that much sewing experience and I was super proud to be able to make it by altering another pattern. :) It’s quite nice to wear. I’ll probably make other(s) in the same style, either maxi length like this or shorter.

Firsts I remember for this project:

  • first vintage style garment
  • first time hacking a pattern

50′s dress: photos

Here are the pictures! ^^ We did a little photoshoot last Sunday.

This dress was quite a challenge! First, because I had a firm deadline for it. That’s not a good idea. When you start you’re very confident, thinking you have plenty of time, and then things happen, you realize you have to make a lot of alterations to the pattern, and suddenly you’re late. Because the bad joke was that the pattern is too big! Seems it’s not my size after all. I see several possible reasons: converting my measurements from cms to inches, matching with the closest (but not exact) measurements on the pattern sheet, choosing a vintage pattern rather than a modern one… And now the result is here: it’s too big, and I got several patterns in the same size! Gertie wrote a post on finding the good vintage pattern size (which I saw afterwards…), in which she suggests you use your high bust measurement and not your regular bust measurement. Anyway next time I’ll order one size smaller!

So in the end a lot of changes had to be made: I took in a few cms in the middle of the back and front pieces, at the sides, at the shoulder seams of the yoke… Because of that I had to redraw the armhole, and with no notions of pattern altering it was a little scary. I made a musling of the Simplicity pattern (top of the dress), which seemed okay, but in the end I find that my dress is a tad too big. The waist and hips could be more fitted. I wonder if I did something wrong or if the fit could have been changed by adding the skirt. I saw in another vintage pattern (for a real dress) that they add a grosgrain ribbon as a waist stay, I’ll try that and see if it’s better. Another alteration I did was to change slightly the placement of the side zipper: it’s supposed to be at the bottom of the blouse, but for a dress I thought it would be better to have it at the top, just under the arm. The last thing that happened, which I hadn’t planned, was with the armhole. They say to finish it with bias tape, but it was just impossible for me! I couldn’t turn it around. I had to draw and add shaped facings instead.

Now let’s talk about the good things! I’m really happy I made this dress. And doing this lead to many first times:- first 50′s dress (and first garment made from a vintage pattern!)- first invisible hem (done with my sewing machine)- first lapped zipper done with my sewing machine- first close-fitting garment (and first time sewing darts)- first gathers done with my sewing machine. I didn’t use a gathering foot to make the whole gathers by machine, but I basted the gathering threads by machine. It was quicker and the gathers are more regular than when I do it by hand!I even used my sewing books four times: for the armhole facings (to do them perfectly), for the zipper, for the invisible hem and for machine gathering. It’s nice to feel you’re making progress.

50′s dress

I’m back! Many things happened after my last post that prevented me from sewing as much as I wanted and bloging. Some nice things, like birthdays or friends visiting, and some not as nice, like a cold and headaches (I’ll let you decide where “working late” belongs). But in the end my last project was completed, on time for the wedding it was intended for, which was last Saturday.

I don’t have nice pictures of the dress on me yet, so this is the only picture you’ll get for now. My challenge was to make a pretty dress from the 50′s. I had decided that for this wedding I’d make my dress myself. And since it had to be nice and elegant (I lile to be dressed up for weddings, in honor of the bride and groom and to make it a special day), I logically turned to the 50′s. To me women clothing of that decade is the most elegant and feminin.

For this dress I used view 4 of the pattern shown in my last post, which is actually a blouse pattern. It’s Simplicity 1201. I’ve had my eyes on it for some time, I like its fitted shape and the different necklines. All variations are really nice. When I found it for sale in what seemed to be my size while I was looking for my dress pattern, I decided to get it and transform it into a dress by adding a skirt.

A few days later while browsing through the pattern pics I saved on my computer I realised there actually was a pattern that was exactly what I wanted to make (picture from the Vintage Pattern Wiki):

I did a little research online to try to get more information. Camelia Crinoline has this pattern and made the dress, you can find it here. She very kindly answered my questions about the fabrics and measurements.

After that the challenge was to find the right fabric. I was one of the two bridemaids and we wanted to match as well as look ok with the bride without wearing the same color as her (navy). Turns out it’s really not easy to find a nice blue fabric that is not navy, baby blue or turquoize. I finally found this one in Dunkirk, and I’m really happy with it.

I hope to show you more pictures later, along with construction details. In the meantime, if you’re interested in vintage clothes you can go check Sew Retro. It’s a collective blog about vintage sewing.