A dot story

It all started with a nice invitation from Marie Savart, a French illustrator that I’m following on Instagram:

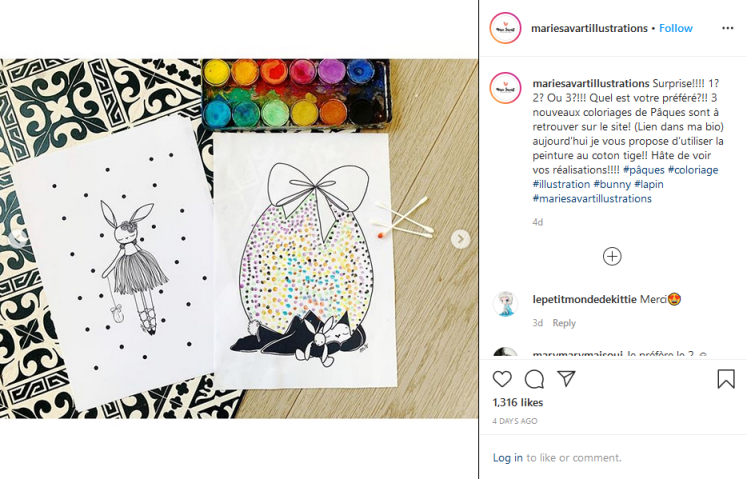
(sorry, I didn’t succeed in displaying the image properly with the script given by Instagram, an old fashioned screen capture with a link to her post will have to do…)

She kindly offered Easter drawings to color, and suggested to use Q-tips to add paint dots on them. Okay, Q-tips are not very eco-friendly and will soon disappear, one will have to find another solution in the future, but I thought it could be an interesting and fun activity to do with my kids, especially the like one who doesn’t go to school yet. It was a nice and poetic way to prepare for the Easter week-end.

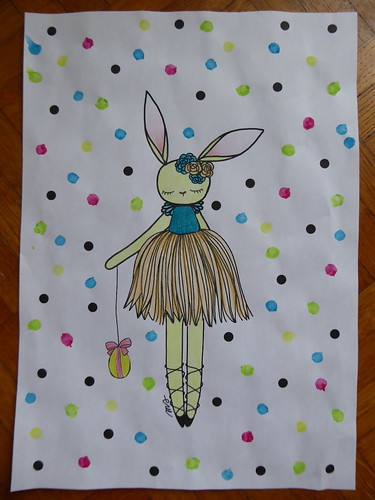
On Friday morning I printed an egg for each of my two kids and then got out Q-tips and gouache paint tubes and explained to them the point of these tools. Since my daughter had decided she wouldn’t color the rabbit I had printed for her the day before, I was happy to sit and do the activity with them on that drawing. I added paint dots behind the dancing rabbit before coloring her with pencils to go with the softness of the drawing.

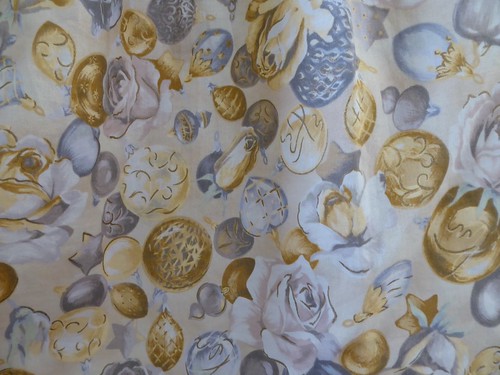
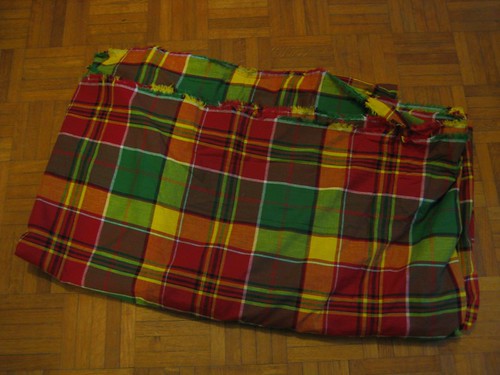
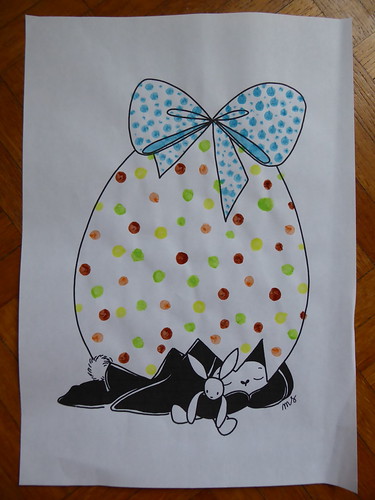
I surprised myself by how fun I found it. Working with the Q-tip is quite relaxing and playful. And of course my love for dots in general probably helps. Since my children where still occupied when I finished, I ended up printing another egg for myself. I filled it with paint dots also. Turning to the ribbon, I didn’t want to color it in full with paint, but I didn’t want to use the same dots as for the egg either. I started by adding dots in a contrasting color, and then to try something different I tried to add smaller dots in various sizes. And it turned out great! I love the result. It reminds me of vintage flowery fabrics.

I then had to leave the table to make lunch, and since my daughter was very focused on her painting I didn’t have the heart to stop her. I figured it would be okay, and I went to check on her regularly. But of course at some point she didn’t have enough paint left and she decided she would refill it by herself! And of course she didn’t tell anyone, so I had the nice surprise of discovering soon after she had emptied half of the green tube on the palette… -_- As soon as lunch could be left cooking alone I tried to use some of it on other paintings to make sure we didn’t loose too much. Since I really liked the motif I had made on the ribbon and thought it would look great on a dress or skirt, I sketched a quick vintage-style dress to follow this idea. I’m not used to color roughs sketches like that but I didn’t have much choice. My husband saw it later on the table and said it was nice. I feel that the dots in this spring-like color give a very fresh look. That said, I think I like the blue ribbon better.

Dotted dress sketchSo here is my story of a morning spent playing with dots. I found it amusing how an activity suggestion for Easter turned into me designing fabric. ;) I’d like to explore this a little bit more in the future.

So what about the kids? Well, as kids do, they didn’t following the given “rules”, of course ! XD That said, they weren’t exactly rules in the first place, just and idea of something to try together. But I like how situations like this can make you rethink you position and change the way you look at things. You come with an idea of what could be good for them, but they use the tools and materials you provide to make something that’s relevant to them at that moment. And in this case, it was perfect! My intention was to spend some time together and do something fun and relaxing for everyone, while getting in the spirit for Easter. My daughter spent so much time focused on her painting, I’m sure she really enjoyed it and what she did was the thing she needed to do at that time, probably more that what I had imagined. You have to be adaptable and listen to your children, even though it’s clearly not always easy to do (or not always possible, but for activities like this it should be).

So little Miss E. quickly decided to use her Q-tip as a brush and proceeded to cover her drawing with thick layers of paint. As I hadn’t expected that, the paper I had used was way too thin for this treatment, and quickly disintegrated. Since she was desperate I printed another egg on thicker paper and she started all over again. Of course after the green paint incident she painted the whole thing green. I find it a bit sad because there were some very interesting colors underneath.

My son painted a few dots, then decided to totally fill the ribbon with color, maybe influenced by his little sister, and then to pain numbers on his eggs instead of adding dots. Since the Q-tip wasn’t a very practical tool for that, he soon asked me for one of our brushes. And of course in the end he decided to add dots around the egg, with the brush. XD

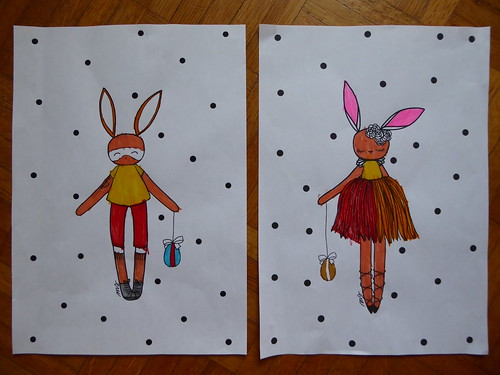
I’m also sharing the two rabbits he colored for Easter (with felt tip pens this time) because I like the colors he used. I’m often quite impressed by his colorings, he tends to make interesting color choices that work quite well together.

I hope you had a nice time last week for Easter and that you had (or are having) a nice week-en this week also. And that you can find joy and have some peaceful times despite the circumstances. Take care!

I made bread!

mini baguettes

I know, I know, sooo original. Everyone seems to  be making bread while confined these days, judging by the posts appearing in my Instagram feed and the lack of flour and yeast in the shops (which is quite annoying when you have kids who would like you to make cookies. I guess many people have kids. Or they feared they wouldn’t be able to go buy their usual bread at the backery, which isn’t happening. At least it makes a bit more sense to me than accumulating toilet paper…). In my defense I’ve been thinking about it for quite some time. The idea has been in the back of my mind for years, I was curious. Especially after I got my baking robot. But I guess I’ve been a bit lazy, it seemed complicated. And I had more important/urgent/fun things to do, my motivation wasn’t so high. I still do, I guess, but there was a real occasion today that prompted me to take the plunge.

small bread

You see, we eat bread (we’re French, right? ;p ) but not that much: we’re not like some people who eat bread at every meal. In our house it’s mainly intended for breakfast toats for Mr Robot and I, sometimes the kids too. And sometimes when the meal really calls for bread (a sauce to finish, paté, sandwiches…). Or when we have cheese that taste better with bread than without, but I love cheese so much I eat it too quickly so I don’t buy any lately. Otherwise, being home and all, I would eat all day long. XD So we tend to buy bread about once a week at our local organic store that’s perfect for morning toats but not so great for other uses. And today we had boeuf bourguignon (or beef bourguignon, as Google tells me) at noon and tarama dip for dinner, typically food that calls for a baguette rather than a soft whole wheat bread.

mini baguettes

So I decided to make bread. ;) I used a recipe that I found on the Internet, which seemed quite easy (it’s an easy baguette with no real kneading) and had great comments. I just switched a small amount of regular flour for a 5 cereal mix flour. At first I intended to use only that one, to save my regular flour for baking cakes and biscuits, but they say on the package that you can’t do that for bread. It was really impressive to see the dough doubling in volume after rising! I let it sit for more that two hours in the robot bowl, covered by a wet tea towel. The recipe mentionned that the dough was sticky and you had to put on a lot of flour on your working surface and shape it quickly. Being a real newbie at this and not used to complicated baking or cooking, I had a really hard time with the shaping! It was indeed very very sticky. I’m still not sure I managed it as I should have. That made me a bit worried about the result while I was waiting for the baking to end.

In the end though it did look and taste like bread. :) My husband really liked it, and my kids didn’t complain. As for me, I think it can be improved. It’s bread but it’s not marvelous bread. Mr Robots says that for a first try it’s good that it’s actually bread, and a bread he takes pleasure in eating on top of that. But I’m a bit disappointed by the taste, which could be better I think (although I have absolutely no idea how to achieve that) and the crust, which I feel is too thick and too dry. I’m also wondering whether they should have been fuller or not, they seem a little bit flat. That said, when we ate it with the tarama this evening the match was just perfect, it was really yummy !

mini baguette side

Here are some ideas for possible improvements, from several articles I read online:

  • Put more water when I preheat my oven, as all the water I had put this time had evaporated when I removed the bread from the oven, and I’m not sure it’s a good thing. They say the moist prevent the crust from being too thick and the bread from being too dry.
  • Put the water at the top of the oven and not the bottom as I did. I only thought of looking this up after baking and tasting the bread, it seemed obvious to me that you would put it underneath… wrong!
  • Don’t put the oven in convection mode, it turns out it’s a bad thing because it drys the bread
  • Maybe bake for a slightly shorter amount of time, because they were really small breads
  • Put less water in the dough, so that I don’t have as hard a time shaping it. I found a similar recipe with much less water (230mL instead of 300mL), and an article which suggested 70% the weight of the flour to 80%, which in my case would be between 260mL and 300mL. This other reciped was also baking the bread at a lesser temperature. I’ll have to see what I try…
  • invest in an oven plate, as with my racks the bottom has a weird shape (and it’s even worse with cookies!). Is bread usually baked on plates rather than racks? I’ve been baking all my biscuits on those racks with parchment paper and didn’t have any problems before baking chocolate-chip cookies and this bread… ^^;

baguette underside

All that leads to… making bread again! ;)

Coming back?

Am I coming back?

Maybe… I’d like to.

Spring is here!

I’ve been thinking about it on and off since I last wrote here. More than four years ago, I know… It’s hard to believe, but I know it’s been that long. It seems like yesterday. Okay, maybe not yesterday, a little bit further that that, but certainly not four years and four months and a few days more. Can I hope to do better this time? Stick to posting, even though I know I have even less free time than I had in 2016? I know I should probably write shorter posts, or maybe drop one language, but I like writing in French and at the same time being able to share with people around the globe who don’t speak French. And I like being able to express what I want, even if it means longer posts.

We’ll see… I think I’ll try it and we’ll see where it goes. Hopefully it won’t take me months (or years!) to write the next post. ;)

2020

In the meantime, what have I been up to during those years. Not much as changed. I sewed (not as much as I’d like), I collected more sewing books, patterns, fabrics, notions and vintage magazines (probably more that I should have), I got a new job (in the same field as before), my son grew up. And I got another baby! A cute little girl, as mischevious as she’s adorable. I try to learn to care for plants instead of causing them to die. Get better at cooking to feed my family ealthy food and change our eating habits. I finaly tried tai-chi-chuan and really like it. I’m trying to get back to drawing a bit. And at the begining of the year I broke something for the first time in my life: my shoulder, and it’s not particularly fun. It’s surprising how quickly you loose your ability to move correctly and how long it takes to recover it (still a work in progress). Please be careful when you go down a staircase. But in short, like went on. ;)

Thank you for sticking with me if you read this and are still here at the end of this post. Hugs to you (virtual and from far away, of course)! I hope you’re safe and will remain so in these troubled times. And see you soon to talk about sewing, of course, but other things too!

Current sewing project

Have a lovely New Year’s eve

I told you I’d try to come back for one last post before the new year. I intended to share the last sewing project I made in 2015. Sadly I had just a short period of free time today and I baked scones for our friends instead. It’s for brunch tomorrow, hoping that 1. they turn out okay, since it’s a recipe I’m using for the first time and 2. they’ll still be okay tomorrow morning when we’ll be eating them. ^^; The good news is that I started processing the pictures, so it shouldn’t be long before you see this project here.

In the meantime I’m leaving you with the teaser picture above and I wish you a very nice New Year’s eve!

Christmas

Is it possible that we’ve come to the end of the year already? How fast did autumn fly… It seems it started only a few weeks ago, and yet yesterday it was the winter solstice. I’ve been engulfed by a huge wave of work that left me little time for anything else and from which I came out quite exhausted. Luckily it’s getting calmer now and I’m slowly getting back to my normal life, and enjoying it. And of course I’m preparing for the holidays.

For me Christmas is all about family, be it your real blood family or the extended “family” you create for yourself over the years. Our son being older we can share more with him this year. He asked to help decorating the Christmas tree, discovered with pleasure the Advent calendar and its chocolates (we usually limit sugary things, but we’re making an exception), learned about Santa (although for now he doesn’t mean much to him gift-wise, it’s just a guy he recognizes on illustrations. I’m not set on telling him that all gifts come from Santa. I like the idea that we carefuly choose relevant presents for our loved ones on Christmas, isn’t it lovely and magical in itself? But as Santa Claus is part of our culture he has to know him, even if it’s just as a story). He likes to listen to his book with Christmas songs and loves looking at the illuminations in the streets and gardens. We’re having a tiny bit of time to spend together, just the two of us, before we start the usual Christmas trips to see family, and I’m happy about it. This afternoon for tea we shared some cinnamon cookies that I had just baked, it was nice.

I have many sewing projects to share with you (some of which are totally off season now!), and I intend to do so, but for now I’m going to wish you all a very happy and merry Christmas! May you have lovely people to share it with and a wonderful time. I’m going to use the few days off I have to rest and enjoy my family, and maybe do a tiny bit of sewing, who knows? And I’ll try to be back for one last post before the new year comes. ;)

Old fashioned sewing

Hello,

Tonight I’m sharing a few excerpts from a French vintage sewing book: Initiation à la Couture Familiale (it could translate as “Introduction to home sewing”). It’s actually a series of two books from 1960 and 1961, which were intended as school manuals or for the home sewer which didn’t have the chance to have sewing lessons at school. They were supposed to give girls and young ladies good fundations to sew quality garments. I found them at the Forney library (a specialised library in Paris devoted to craft, fashion, design and such which I adore, lots of interesting books there. Definitely check it out if you live in Paris or nearby!) some time ago. It’s funny to read the foreword now, because we don’t study sewing or any other home related matters in school nowadays, so it seems very dated when really it wasn’t such a long time ago. My mom had sewing lessons at school in the 60s and I didn’t in the 80s. I personnaly think it’s a shame, every boy and girl should learn some basics in sewing, knitting, cooking and such, it would be very useful!

The text I’m showing you here is from the first section of the first book, teaching different kinds of stitches. By the way if you’re able to read French I suggest you read the French version of this article, because it’s a bit more comprehensive. The reason I’m sharing those pages today is because when reading this it struck me as delightfully old-fashioned. About the simple stitch is says that “We no longer stitch by hand, but use a machine”. Who would think it necessary to clarify this nowadays? All the other stitches are explained as hand stitches, and are supposed to be done this way. Including the overcasting stitch. A modern book would explain you to use your machine zigzag stitch or use a serger if you’re lucky enough to have one… They also make a difference between regular clothes and underwear, mentioning when a stich or seam finishing (pictures below) is more adapted to lingerie. I haven’t seen many modern book talking about lingerie stitches or seam finishes, except if they’re devoted to this particular subject. Who wears those fine and fancy petticoats and slips today? A few vintage fashion lovers. I do love slips, I find them very elegant and feminin and useful, and I think they are very pretty objects, but judging from how hard they are to find I guess they are not many of us. And among those, who take the time to sew them?

Those pages are from the section describing the different types of seams. There again most of them are made by hand, and they point those that are useful for lingerie. I also like that cotton fabric isn’t the only or even the main fabric mentionned here. I feel like wools, rayon and silks have a more central place.

That said and old-fashionness put aside, those techniques are still totally appropriate today, whether you want to sew by hand or to adapt them to using a sewing machine.

Lucky finds, October 2015

Hello dear readers! I have many things to share with you. Sewing projects but also several inspirational things, as the past few months were rich with good findings. I have been to a few garage sale the past weeks, which I haven’t done a lot this summer. As you probably already know if you’ve been around for some time I like vintage clothes and old books and magazines. I entered the world of garage sales when we were looking for decor props for our wedding and I got hooked. We don’t have estate sales in France (or at least they’re not the thing they are in the US and there are not as many), so we’re left with garage sales to try and find interesting goodies from the past. Sadly it seems that the tendency here is more for people to throw their old patterns away because they think they won’t be interesting to anyone nowadays, which I find really sad, and which makes finding old sewing patterns a bit of a challenge. When I see the posts on the WeSewRetro Facebook group and other groups for selling vintage patterns, it seems it doesn’t work the same in the US where people seem to find patterns much more easily. But I’m still hoping to be able to find interesting patterns here someday (or talk enough about this around me to the people I know to be able to salvage some from the dumpster ’cause they’ll know some people could be interested). Anyway, back to the subject! I made some good findings last Sunday at two garage sales, and I wanted to share them with you.

As you might have guessed after reading the introduction, I didn’t find any pattern per se, but I did find many sewing related magazines, from different periods of the 20th century. :) At the very start of my first visit I discovered a pile of magazines in front of a booth. I couldn’t believe my eyes! The lady told me that she grabbed almost all the magazines she found in her attic, which belonged to her grandmother, saving just a couple for herself. To other ladies went by while I was quickly browsing through them to decide what to bring home, and I was quite happy to have been there early. In the end I bought almost all of them. ^^; There is a catalog from the Louvre dating from 1935, with a part on clothes but also some housewares, and about ten issues of “Le Petit Echo de la Mode” from 1937 to 1939. Those are fragile, two in particular are a bit damaged. I might do copies or scans of those to keep another “safer” version.

Among those magazines were also two pattern catalogs from 1917-1918 for “Les patrons français Echo”. I didn’t know this pattern brand, I’ll try to look into it. Those went directly into the “I’ll take them” pile without thinking! ^_^

On another booth I found this little book title “Je serai couturière”, which means “I will be a seamstress”. It’s a collecting of sewing advice previously published in the “Modes et Travaux” magazine, grouped together in one booklet to create a sort of sewing reference guide. It was published in 1952 and has 79 pages organized in sections (how to use a pattern, sew sleeves, necklines, closures…).

Then somewhere else I found three issues of that same magazine the book was made from, Modes et Travaux, dating from 1967, 1973 and 1979. Inside you can find some sewing inspiration and knitting and crochet patterns. That’s all for sewing magazines, now let’s see some knitting ones. I don’t knit so I usually skip those, but recently my mom (who used to sew but now mainly knit and crochet) told me that she was disappointed at the modern knitting magazines, that she used to find more interesting things back in the days. So I thought “Hey, I’ll look for things for her!”. Those weren’t very expensive so I guess it’s not a huge loss if she’s not interested in any of those, and I can use then as inspiration maybe. If I knew how to knit, I’d definitely make some projects from those magazines!

There is a Phildar magazine without any date on it, but from the style I’m guessing 70s or 1980-1981 at the latest. I hope she’ll find some things of interest in this one. The other two are much older, so I’m not sure she’ll like them, but they were amongst the pile of fashion magazines from the 1930s and I thought the idea of magazines around knitting patterns + a novel (which the title “Tricot-roman” means) was fun. And then two Phildar devoted to babies clothes. This is not a hint to a big reveal, it’s just that there were some cute clothes inside, they were really cheap and I foresee possible other babies in my mom’s future as beside me my mom has two other children, both younger than me.

And then some materials. First two pieces of lace, one that I intend to cut and use as appliques and the other to sew on the border of a future piece of clothing. Under them you can see a piece of fabric I also got at the garage sale. We call that king of fabric “madras” in French, I don’t know if there’s a special name for that kind of cotton check fabric in English… I love that type of fabric, but didn’t have any in my fabric stash. I fell in love with the colors and considering the crazy amount of yardage I got for the price I paid it was a steal, and I couldn’t let it pass. And now I’m off to think about my next sewing projects. ;p

What I’ve been up to for 7 months

Today I want to share with you my biggest sewing project of 2015. Probably even my biggest project ever so far. This is the reason for my disappearance of the Internet at the beginning of the year, which gave me bad blogging habits (aka not blogging). A project with a lot of work and a good level of stress, but also one that makes you learn and progress, and hugely satisfying.

No, I didn’t build a car. This year I made a wedding dress. And not a wedding dress for myself (I already did that), no, one for someone else! My sister in law, or rather at the time my future sister in law as she was my brother in law’s fiancee.

Almost 9 months between the first talks (when it hadn’t been decided yet that I would work on it) and the wedding day, 1 Burda Style magazine, lots of sketches, talks, 3 visits to Paris fabric district, lots of fabric (5 different types), a Pinterest board, several muslins, 6 try-ons (not sure it’s how you call it… when the person tries the muslin to test the design and fit), travels between the North of France and Paris, countless hours of sewing, a few hours of head scratching, a good deal of paper, 6 band-aids, a serger, a sewing machine and some hand sewing, embroidery, many pictures taken, some emails, some plant-based relaxing pills, mistakes, corrections, not a lot of sleep in the end. And after all this, a lovely day, a beautiful bride,a sense of accomplishment from completing this project, the satisfaction of the bride and groom and their families, a wonderful ceremony, a marriage that I wish very happy. And two sisters in law that got a little closer. I think you can say it was worth the work, don’t you? ;)

It’s funny because it’s only the week after the wedding that I realized how huge it was that she trusted me with this. Granted, she’s not the worried type, but still, she didn’t have any second choice just in case, and she never showed event the slightest bit of fright or worry that I wouldn’t finish on time or that she might not like the result. I accepted the challenge, I would be up to it, she trusted me, and that’s it. Quite nice, he?


Of course I’d love to go into more details on the making of this dress, and I hope I will. But knowing how I tend to write long texts and the current frequency of my posts, I thought I’d start by sharing pictures with no technical info. So that you can see it, and I start writing here again, you know, one step at a time. And maybe in the future I can share more technical stuff about this project. In the meantime I hope you’ll enjoy the pictures of this special day. ^^

New page: projects compilation

Just a quick note to let you know about a new page that appeared earlier this year: a yearly overview of my projects. You can find it here : http://anomori.com/blog/?page_id=1601. Each year, towards the end of the year or the beginning of a new one, you see overview posts appear on sewing blogs. I’ve never done it before, but at the beginning of 2015 I felt the urge to do one (even though I noticed fewer of those on the sewing blogs I read ^^; ). I guess with me stopping the sewing lessons I felt the need to look back on the past year and see how it went. I always have the feeling that I’m not sewing that many things, especially compared to some of the bloggers I follow. Since I had never done one of those posts, I had to dig into my archives to find my past projects so that I could compare. And in the end this page listing all the past projects I could remember and find was born!

I will add to it as I post new (or old) projects. It’s fun to see this kind of overview of my past work. Even though it is true that I don’t produce as much as others, I don’t really care about that. But I do care that I don’t produce enough compared to all the list of clothes I imagine in my head. So my goal will be to get better at that: use the fabric I already have (and have projects for) and actually make and finish more projects! This year I’d like to make more clothes in knit fabric, make clothes for my son and start making doll clothes again. I started the year with many projects in mind ! One step at a time, I hope to get closer to achieving them.

What about you? Do you do compilation posts or pages? Do you set goals for the year (or any other period of time) or do you decide on the spot?

Notebook necklace

Hello ! I hope you’re having a great 2015 year so far. I left you with a rather worrying post about my Internet connexion the last time I wrote… I’m happy to say everything went back to normal after a short time. But then life happened (work, lack of spare time, sewing projects, memories to build with my son, a very tired me) and even though I really like this place I couldn’t find spare time for blogging. But I’ve been sewing! And I keep reading blogs through my Feedly app on my phone while commuting (I’m really happy smartphones exist!).

I’m  back with a simple project today. If I want to be able to post articles I’ll have to fight my tendency for very long posts, cause those end up never being done. So here is a Christmas gift I made for a dear friend.

I didn’t make the book/notebook myself, I bought it from the ladies of a bookbinding workshop at a Christmas market. All I did was create a necklace around it. I like simple pieces of jewellry so this necklace reflect that.

I wanted to add something besides the book, and when I found this quill I really liked it. It reminds me of the quills people used to write in past centuries. I spent quite some time moving it from one place to another on the chain to find the arrangement I liked best.

I added a small metal tag near the opening system. I find it’s a nice touch, it adds some interested at the back.

On this picture you can see that it’s a real miniature notebook with pages you can write on. I recycled some tissu paper and a little box to have a nice package. I even printed and glued my logo to the package, on top of the original writing. It was fun. ^_^

I got another book for myself, so a second necklace will be made as soon as I have some more chain and another quill.