Tutorial: hairband

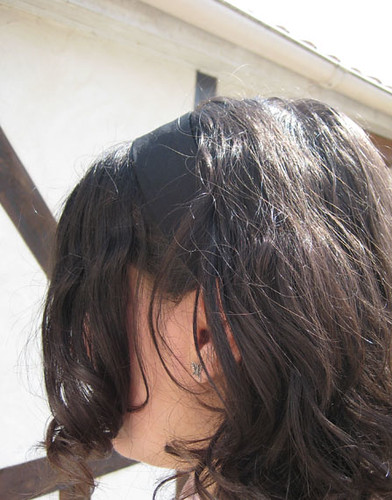
Here is the tutorial for this hairband. It’s adapted from the Pochee vol.8 one, I reduced the width. Since I didn’t make it really by myself I wasn’t sure I’d post the tutorial. But I decided to do it anyway for the following reasons:1. It’s far from being the main project of the book. I doubt anyone would buy it because of this pattern only (that said, I really recommend it ’cause it’s full of great pieces!)2. the cooking blogs often share recipes taken from books, sometimes with their own variations, sometimes as is. Crafting is a little like cooking, so why wouldn’t we do the same?My point is not of course to make the book useless, as you would have guessed. But this is a simple project that I thought could be useful and I wanted to share my version of it. I’m only showing my own images here, not images from the book.

You will need enough fabric to cut the pieces shown above. You’ll also need elastic band for the back to the hairband. I used two pieces of 3,5mm x 10cm. You’ll also need what you want to use for embellishment.

Assembly:- take the main piece, fold it wrong side out, sew the open side (about 1cm from the edge).nullTurn right side out and iron on.- for the end pieces: turn the sides toward the center, right side out. You should obtain a piece that is 3cm by 5cm. Iron on to mark folds.- 
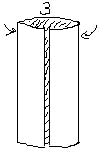
Here you fold the ends of the main piece so that it’s the final size (1,25cm):

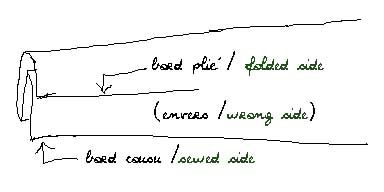
- Then it’s the part that I found the most difficult: sew everything together.
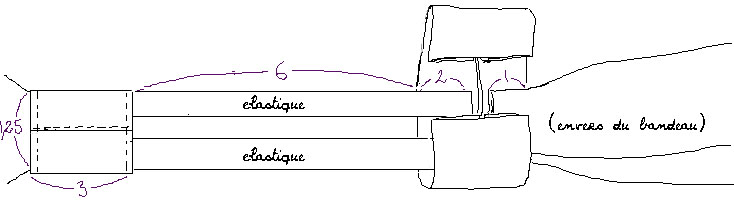
The elastic band had a tendency to go away so I started by sewing the end pieces to the main piece and then sewed the elastic bands to the end pieces. The end pieces are folded like that:

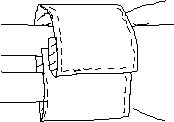
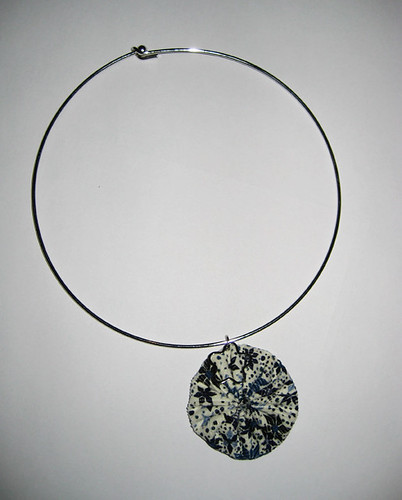
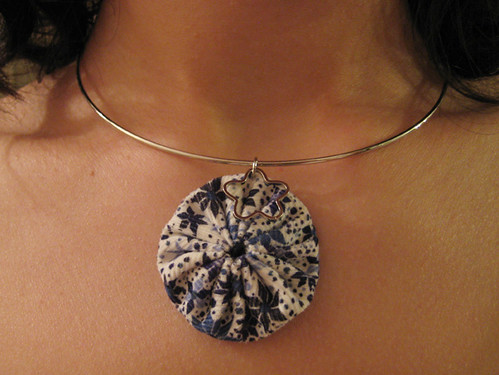
About embellishments:I’m not detailing the way to add embellishments here, but you can of course add anything on the band. Most of the embellishments (adding lace, fabric, embroidery…) are best to be put before sewing anything, otherwise you might see the stitches on the back of the hairband. In my case, the bigger yo-yo is wider than the band, so I couldn’t add it before sewing the band. I hand sewn the yo-yo in the case, carefully, so that no stitch would be seen on the back.

Note: you can also cut the main part as two 6x43cm pieces. Then you put them right side on right side and sew each long side. Then you turn them right side out and keep on as above. It might be easier to add embellishments to one side.

Let me know what you think about it or if you have questions.

Pretty shoes and a tiny bit of sewing

Here it is, the age of weddings has started for us! It’s funny how it all seems to happen suddenly. One day you’re quietly living your life, and the next day you’re surrounded by happy news: engagements, weddings, friends getting pregnant, babies… So last week we went for the first time to a friends’ wedding.

Of course I needed a nice dress for the occasion (sadly I didn’t have time to make one), and a nice pair of shoes to go with it. Which gave me the excuse to get those pretties, that had been tempting me for months:

I love their colour!! At first I was thinking of getting black shoes. But I just couldn’t get them in “boring” black when they existed in such a nice shade of blue. So in the end I got the outfit below (I took this picture the day after the wedding so my dress has wrinkles).

But when I tried on my outfit before the wedding, I realized it was missing some blue color at the top. Since I couldn’t improvise a last minute trip to the store, and couldn’t sew a bolero or stole, especially without the proper blue fabric, I decided to make a necklace. I’m really lacking some more blue accessories!

Here is what I improvised:

The yo-yo is made in blue Menasse Liberty cord. It was the only thing I had that could match my shoes and bag! It was a little hard to cut into this fabric, which was a gift from a friend who lived in London (bought at Shaukat), and which I’ve been saving since for the perfect project (I’m sure you do this too!). But at least now I can tell her that I made something with it!

For those who don’t know Liberty fabrics by heart, this is what it looks like:

The funny thing is that in the end I wore another necklace, that my mother lend me. She and my sister thought it looked better with the outfit and my husband thought it was more elegant… But I’m sure I’ll find other occasions to wear a blue necklace! Here is a picture of it worn:

I’m not sure if I’m going to leave it as is, or if I’m going to change it into a long necklace that I might use more often. We’ll see!

Nice discovery

I’m happy, tonight after going to the post office near my job (I work in Paris) I made a nice discovery: there is a Toto shop in the neighborhood!! “Toto” is a chain of fabric shops in France. ^_^ How good is that: fabric that is not very expensive, within 15 minutes of my job, in a shop that closes at 7pm and stays open at lunch time (which means I might have a chance to actually go there during opening hours!).

I learned since I started working that sadly working in Paris doesn’t mean you have easier access to the interesting fabric shops there. Those I’d like to go to close early, and it takes at least 30 minutes by subway to go there from where I work. I had no chance to go since March! That’s why I’m so glad I discovered this shop. But I’m not going to spend all my time and money there, I’ll be reasonable. I was tonight: I had to go home early so I didn’t even enter the place! ^^;

Stay tuned for a wedding party outfit and very small related sewing. And I’d like to post a tutorial for the headband I showed the other day.

Accessory

As you can see, I don’t have much free time lately… The new life I started in France is very time consuming. So when I finally got a few hours to spend sewing, I decided to do something quick and simple: something with instant gratification. I decided to make something pretty for my hair: a headband adapted from the Pochee magazine (vol.8).

(not easy to photograph a black headband on dark hair…)

I reduced the size because I now have shorter hair and wasn’t sure a very large one would fit me. I had lots of embellishment ideas, but in the end I went for something that would be easy to coordinate. I added two black yo-yos made in the same fabric as the main part.

And now that I know it fits me I can make other versions, changing fabric and adding other embellishements! Which is great, because with shorter hair I don’t have that many hairdo options (I miss my long hair sometimes).