Old fashioned sewing

Hello,

Tonight I’m sharing a few excerpts from a French vintage sewing book: Initiation à la Couture Familiale (it could translate as “Introduction to home sewing”). It’s actually a series of two books from 1960 and 1961, which were intended as school manuals or for the home sewer which didn’t have the chance to have sewing lessons at school. They were supposed to give girls and young ladies good fundations to sew quality garments. I found them at the Forney library (a specialised library in Paris devoted to craft, fashion, design and such which I adore, lots of interesting books there. Definitely check it out if you live in Paris or nearby!) some time ago. It’s funny to read the foreword now, because we don’t study sewing or any other home related matters in school nowadays, so it seems very dated when really it wasn’t such a long time ago. My mom had sewing lessons at school in the 60s and I didn’t in the 80s. I personnaly think it’s a shame, every boy and girl should learn some basics in sewing, knitting, cooking and such, it would be very useful!
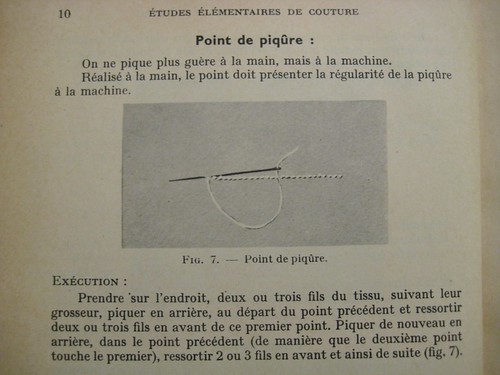
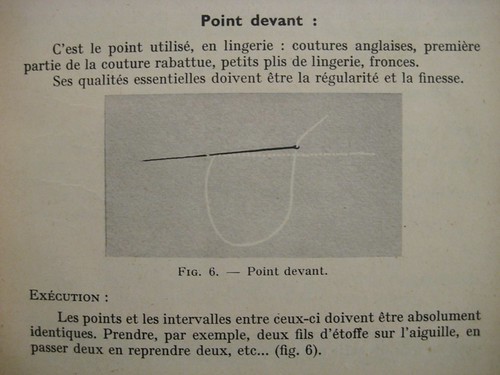
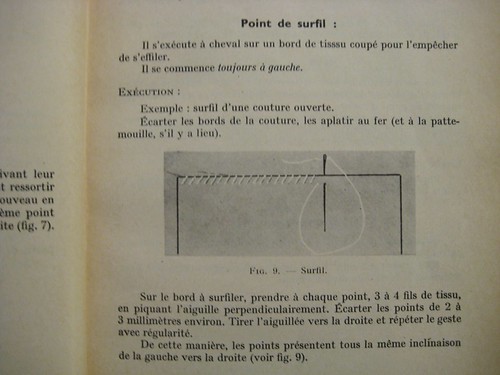
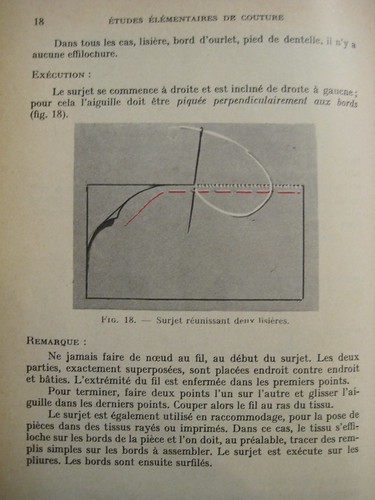
The text I’m showing you here is from the first section of the first book, teaching different kinds of stitches. By the way if you’re able to read French I suggest you read the French version of this article, because it’s a bit more comprehensive. The reason I’m sharing those pages today is because when reading this it struck me as delightfully old-fashioned. About the simple stitch is says that “We no longer stitch by hand, but use a machine”. Who would think it necessary to clarify this nowadays? All the other stitches are explained as hand stitches, and are supposed to be done this way. Including the overcasting stitch. A modern book would explain you to use your machine zigzag stitch or use a serger if you’re lucky enough to have one… They also make a difference between regular clothes and underwear, mentioning when a stich or seam finishing (pictures below) is more adapted to lingerie. I haven’t seen many modern book talking about lingerie stitches or seam finishes, except if they’re devoted to this particular subject. Who wears those fine and fancy petticoats and slips today? A few vintage fashion lovers. I do love slips, I find them very elegant and feminin and useful, and I think they are very pretty objects, but judging from how hard they are to find I guess they are not many of us. And among those, who take the time to sew them?
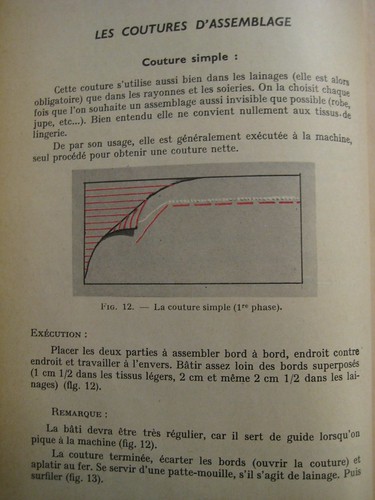
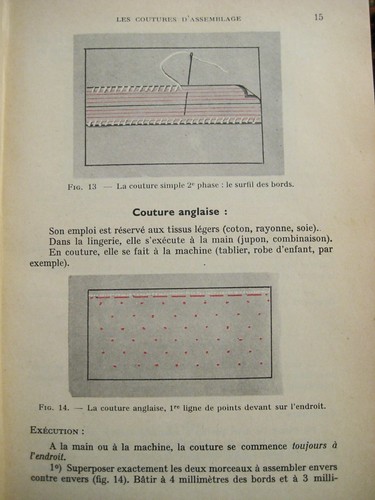
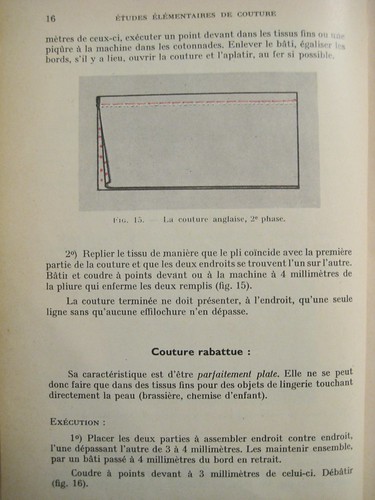
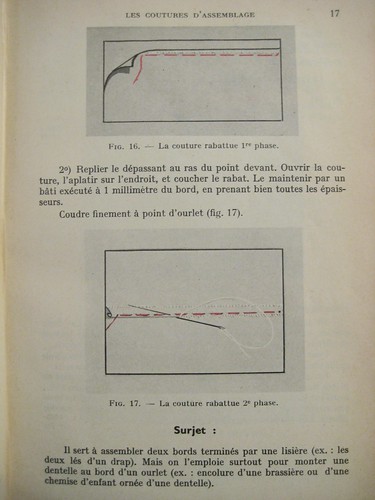
Those pages are from the section describing the different types of seams. There again most of them are made by hand, and they point those that are useful for lingerie. I also like that cotton fabric isn’t the only or even the main fabric mentionned here. I feel like wools, rayon and silks have a more central place.

That said and old-fashionness put aside, those techniques are still totally appropriate today, whether you want to sew by hand or to adapt them to using a sewing machine.

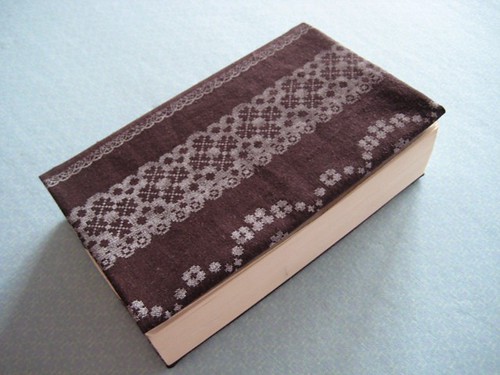
Surprise: fabric book cover tutorial!

Hello!

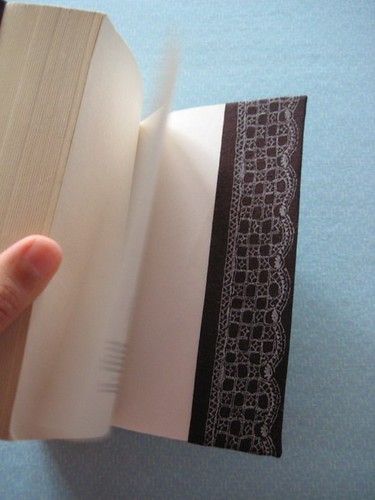
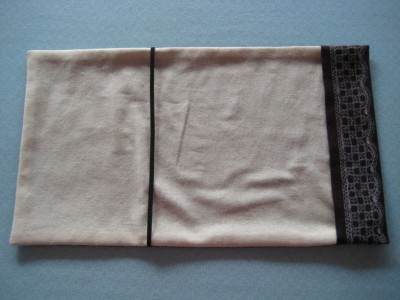
I’ve been working on this for a while, and now it’s ready: a tutorial to create a fabric book cover similar to the one I made for Giveaway Day! At first I was planning to have a “book cover” themed event for the blog’s three years anniversary with a book cover giveaway and this tutorial. In the end the giveaway was done a week before my blog turned three and the tutorial is up almost a week after. There is a kind of symetry to it…

This cover is quite simple as far as sewing goes, which makes it perfect for beginners and perfect for playing with cute fabrics and embellishments. Experienced people can have fun using more complex techniques for creating lots of different “tops”. It also makes a good gift for friends and family members. The one you see pictured here is the first one I made, to test the concept. I used it almost every day since.

I did my best to write a tutorial that would be nice to read and detailed enough so that beginners would be able to follow it. I also included variations and embellishments suggestions at the end. Because of that it’s a little on the long side, so I prefered making a downloadable pdf file rather than writing it directly on the blog. I tend to like pdf files over blog post tutorials anyway, they’re easier to access to when you need them at home.

download Book-cover-tutorial.pdf

If you use this tutorial I’d be more than happy to know what you think about it and to see your finished products! Please leave a comment here with a link to a post or a picture, or send me an email. :)

Tutorial: how to make gathers

Last week someone left a comment here looking for advice on making the gathers for the Lisette bag. This gave me the idea to talk about the method I use for gathering, as it could be useful to others.

I discovered this method to prepare gathers by machine instead of doing it all by hand last year in my sewing book. I’ve been using it ever since, because it saves time and, in my case, it makes more regular gathers. It uses regular thread in place of basting thread, which is good for thick fabric because your thread won’t break as easily. It’s not as easy to remove the gathering threads afterwards, but sometimes you don’t have to. I left them in place on the Lisette bag since they’re hidden inside. For this tutorial I used a remnant of my bag’s fabric.

How to make gathers

* choose the straight stitch on your sewing machine and set the stitch length to the maximum length

* set the thread tension to zero

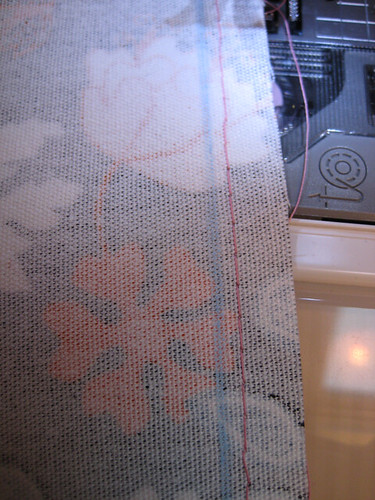
* stitch a first straight line along the part that will be gathered

* stitch a second line approx. 6mm away from the first. Be as regular as you can so that the stitches match.

On the Lisette bag I stitched both lines inside the sewing allowance so that I didn’t have to remove the threads. On the pictures the sewing line is in blue.

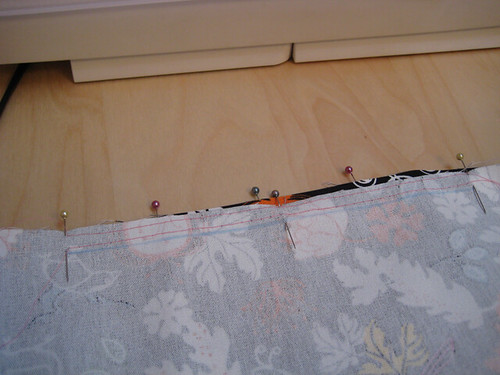
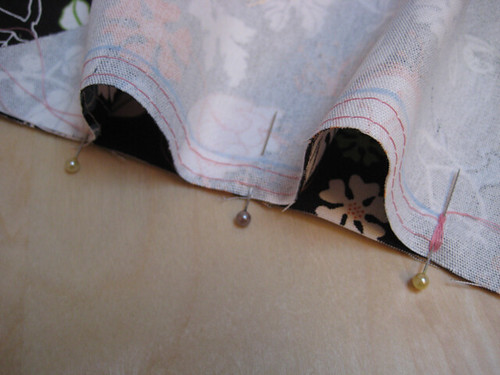
* to pin the gathered fabric to the fabric it will be attached to, I start by marking different corresponding points on each fabric (middle of the gathered section, quarter, …).

* then I match them before pining. This will help spread your gathers evenly. The pins are perpendicular to the stitching line.

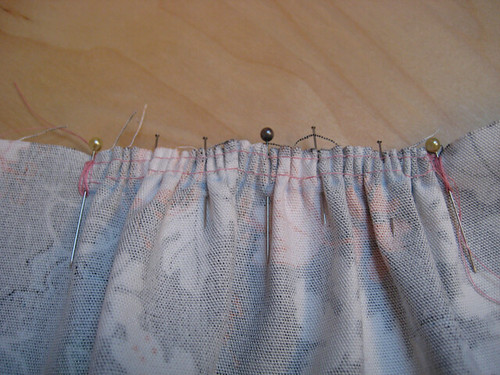
* the gathers are made using only the top threads. Those at the back of the fabric are left alone. First you have to block one end of the threads, by rolling them around a pin. You then pull the threads at the other end to create gathers. Move them to the other end as you go. Go slowly and do not pull too hard, especially with thick fabrics. If it seems the thread won’t go further, stop pulling and move the gathers towards the other end before you start pulling again. Here is a little video I made to show what I’m talking about:

* when the gathers are looking good and the two fabrics are aligned, add some pins so that the top fabric can’t move. All you have to do now is stitch on the sewing line. Do not forget to set the stitch length and thread tension back to their usual values first!

I’d be happy to know what you think of this tutorial, so do not hesitate to leave a comment.

Of course there are other ways to make gathers. The classic way, that my mother taught me, is to prepare them by hand with a basting thread and then sew between the two gathering lines. You can also get a gathering foot for your sewing machine. Those gather and stitch all in one step. I have one but I haven’t really used it yet. Maybe I’ll write about those in a future post if I get used to it. ^_^

Tutorial: hairband

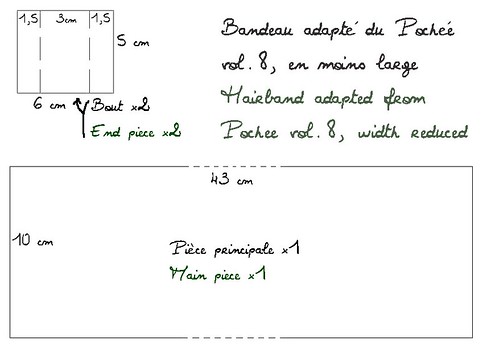
Here is the tutorial for this hairband. It’s adapted from the Pochee vol.8 one, I reduced the width. Since I didn’t make it really by myself I wasn’t sure I’d post the tutorial. But I decided to do it anyway for the following reasons:1. It’s far from being the main project of the book. I doubt anyone would buy it because of this pattern only (that said, I really recommend it ’cause it’s full of great pieces!)2. the cooking blogs often share recipes taken from books, sometimes with their own variations, sometimes as is. Crafting is a little like cooking, so why wouldn’t we do the same?My point is not of course to make the book useless, as you would have guessed. But this is a simple project that I thought could be useful and I wanted to share my version of it. I’m only showing my own images here, not images from the book.

You will need enough fabric to cut the pieces shown above. You’ll also need elastic band for the back to the hairband. I used two pieces of 3,5mm x 10cm. You’ll also need what you want to use for embellishment.

Assembly:- take the main piece, fold it wrong side out, sew the open side (about 1cm from the edge).nullTurn right side out and iron on.- for the end pieces: turn the sides toward the center, right side out. You should obtain a piece that is 3cm by 5cm. Iron on to mark folds.- Here you fold the ends of the main piece so that it’s the final size (1,25cm):
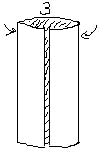
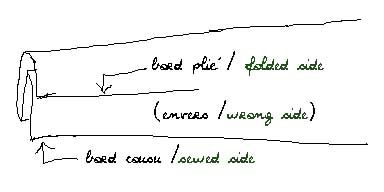
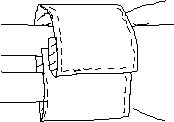
- Then it’s the part that I found the most difficult: sew everything together.The elastic band had a tendency to go away so I started by sewing the end pieces to the main piece and then sewed the elastic bands to the end pieces. The end pieces are folded like that:

About embellishments:I’m not detailing the way to add embellishments here, but you can of course add anything on the band. Most of the embellishments (adding lace, fabric, embroidery…) are best to be put before sewing anything, otherwise you might see the stitches on the back of the hairband. In my case, the bigger yo-yo is wider than the band, so I couldn’t add it before sewing the band. I hand sewn the yo-yo in the case, carefully, so that no stitch would be seen on the back.

Note: you can also cut the main part as two 6x43cm pieces. Then you put them right side on right side and sew each long side. Then you turn them right side out and keep on as above. It might be easier to add embellishments to one side.

Let me know what you think about it or if you have questions.

Tutorial links: felt stuffies

To follow up on the previous post, I’d like to share a few links I collected about felt stuffies. First, here is a link I found very useful, on how to choose a stitch for hand sewing felt (with links to detailed pages about those stitches): http://www.futuregirl.com/craft_blog/2007/10/choosing-stitch-for-hand-sewing.aspx.

And here is a list of nice tutorials I found for felt stuffies:- Sasha the seahorse- Supercute Sea Creatures- Sigmund the octopus (I started one months ago, but sadly he’s not finished)- Buche de Noel: part 1, part 2 (I wanted to do one for Christmas, bought the material, but didn’t have time to do it… next year maybe?)- Bonhomme en pain d’épice (French)- coeur décoratif (French)

And what about you? Do you know any good tutorial on the subject you’d like to share? I’d love to discover new interesting ideas. :)