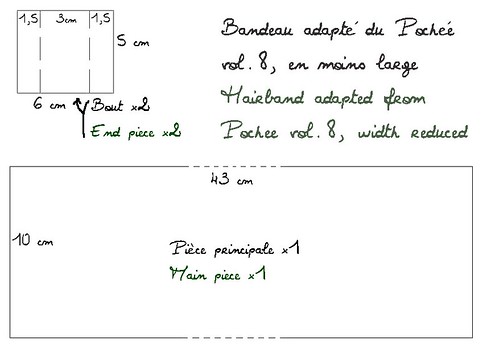
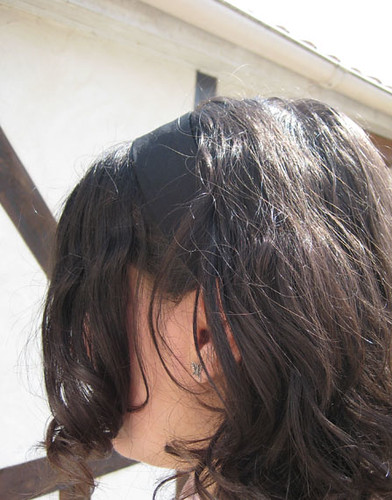
Here is the tutorial for this hairband. It’s adapted from the Pochee vol.8 one, I reduced the width. Since I didn’t make it really by myself I wasn’t sure I’d post the tutorial. But I decided to do it anyway for the following reasons:1. It’s far from being the main project of the book. I doubt anyone would buy it because of this pattern only (that said, I really recommend it ’cause it’s full of great pieces!)2. the cooking blogs often share recipes taken from books, sometimes with their own variations, sometimes as is. Crafting is a little like cooking, so why wouldn’t we do the same?My point is not of course to make the book useless, as you would have guessed. But this is a simple project that I thought could be useful and I wanted to share my version of it. I’m only showing my own images here, not images from the book.
You will need enough fabric to cut the pieces shown above. You’ll also need elastic band for the back to the hairband. I used two pieces of 3,5mm x 10cm. You’ll also need what you want to use for embellishment.
Assembly:- take the main piece, fold it wrong side out, sew the open side (about 1cm from the edge). Turn right side out and iron on.- for the end pieces: turn the sides toward the center, right side out. You should obtain a piece that is 3cm by 5cm. Iron on to mark folds.
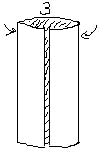 - Here you fold the ends of the main piece so that it’s the final size (1,25cm):
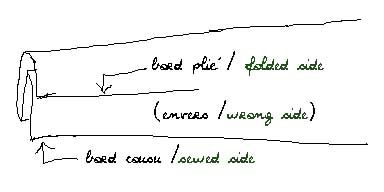
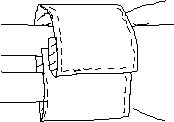
- Then it’s the part that I found the most difficult: sew everything together. The elastic band had a tendency to go away so I started by sewing the end pieces to the main piece and then sewed the elastic bands to the end pieces. The end pieces are folded like that:
About embellishments:I’m not detailing the way to add embellishments here, but you can of course add anything on the band. Most of the embellishments (adding lace, fabric, embroidery…) are best to be put before sewing anything, otherwise you might see the stitches on the back of the hairband. In my case, the bigger yo-yo is wider than the band, so I couldn’t add it before sewing the band. I hand sewn the yo-yo in the case, carefully, so that no stitch would be seen on the back.
Note: you can also cut the main part as two 6x43cm pieces. Then you put them right side on right side and sew each long side. Then you turn them right side out and keep on as above. It might be easier to add embellishments to one side.
Let me know what you think about it or if you have questions.

