Japan-inspired book cover n°2

At last I have a completed project to share with you. And it’s one I’m quite happy with. It’s another book cover, once again for a gift. This one was for my father, who wanted his own after seeing the ones I made for other family members. It was his birthday during the Easter week-end so I decided to gift him one.

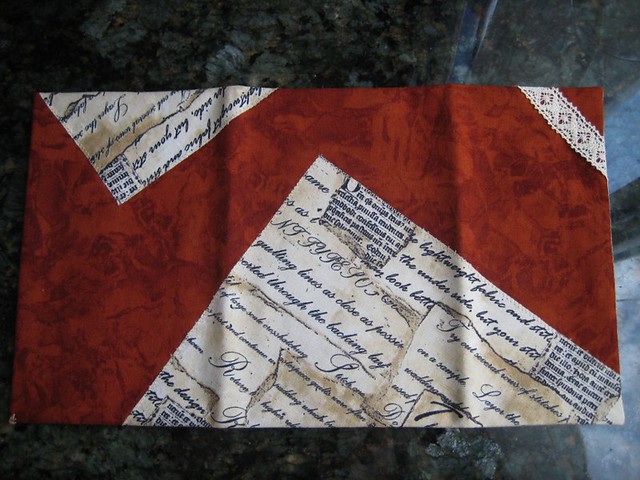
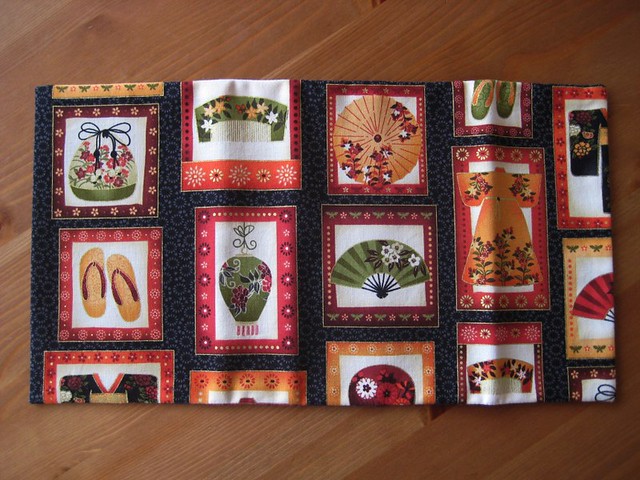
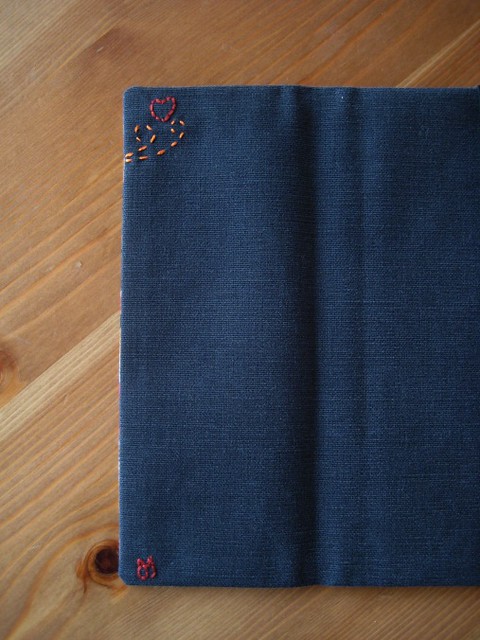
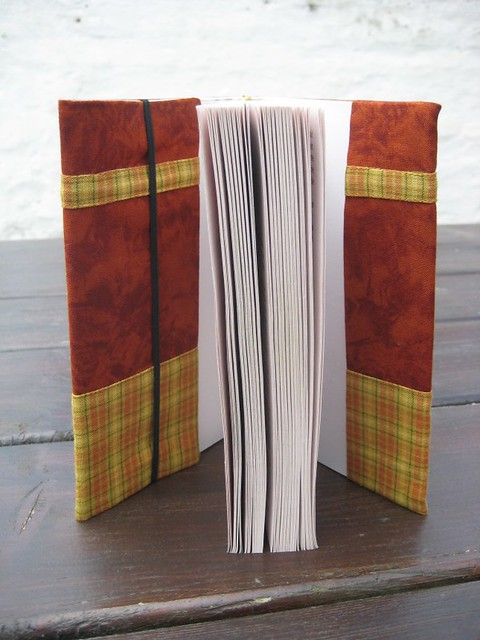
He got quite passionate about Japan when we got to live there, reading lots of books about the country, so it was one possible starting point for the cover. Especially since I still had some of this fabric, and was on a short schedule so embroidery was quite out of the question. As I didn’t want it to be an exact copy of the one I made for my husband, I decided to use the square fabric motifs as appliqués on a solid background.

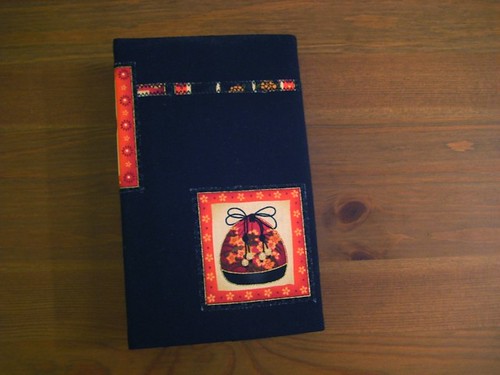
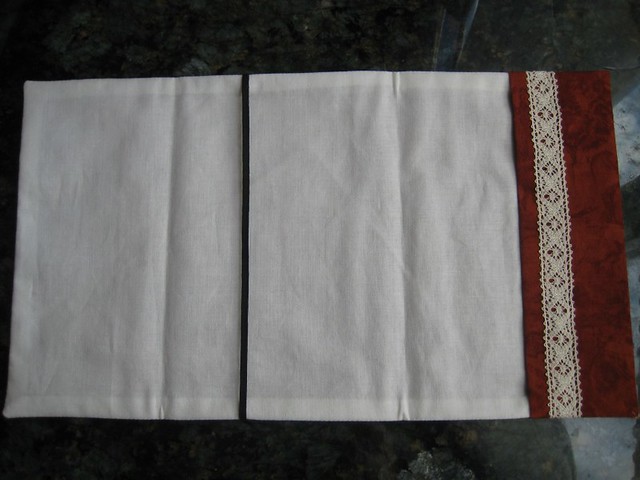
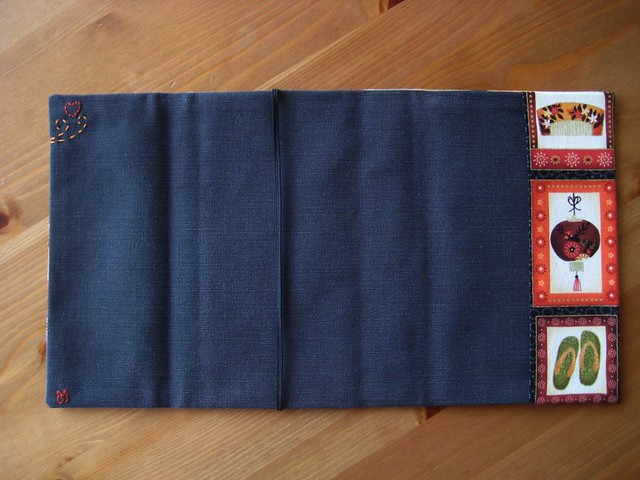
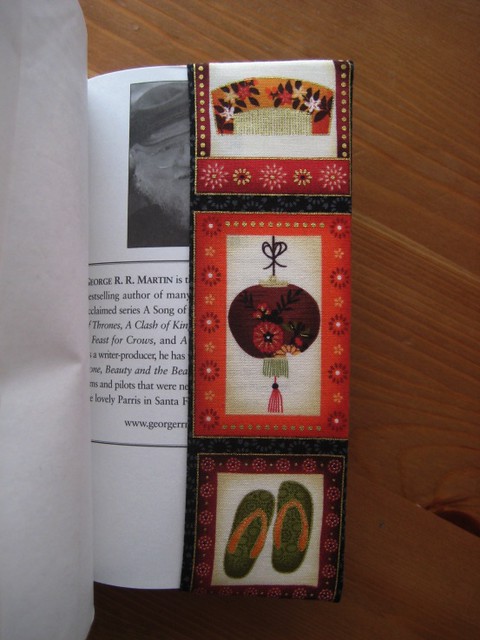
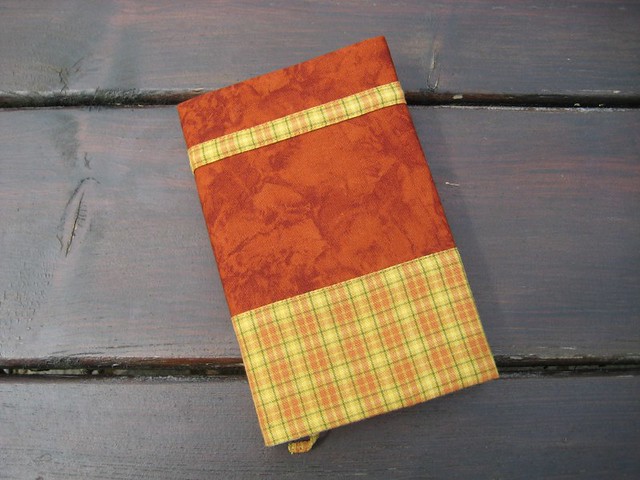
At first I thought I’d just use the motifs, but it looked a little bit empty and sad. I played for a bit with the design to see what I could add, and then I realized I could use the small stripes I got left after cutting as ribbons. It was perfect: since they’re thin you can’t distinguish the motifs so it wouldn’t get too busy, and at the same time the colors match exactly! After some fiddling around I found a layout that I liked and sewed everything in place with a zig-zag stitch. In the end it adds a sort of modern graphical feel to the cover that I quite like, with the colored motifs contrasting against the black background.

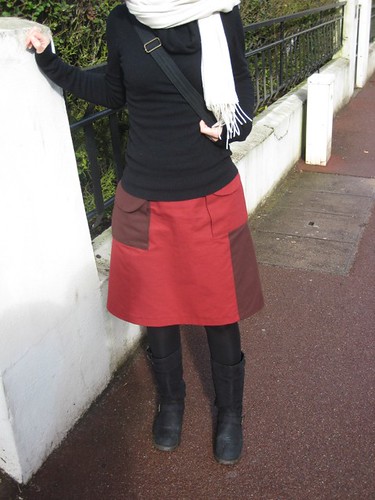
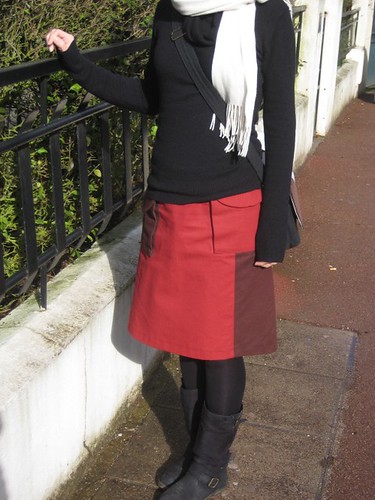
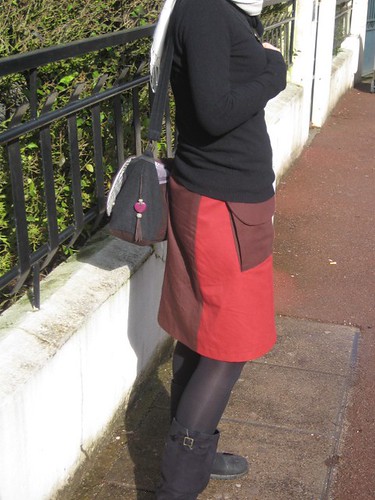
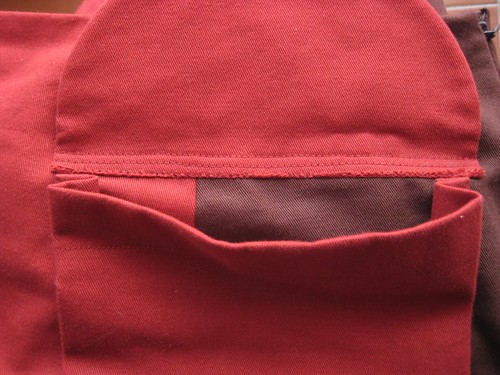
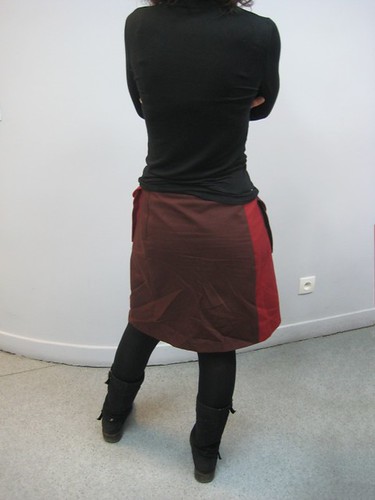
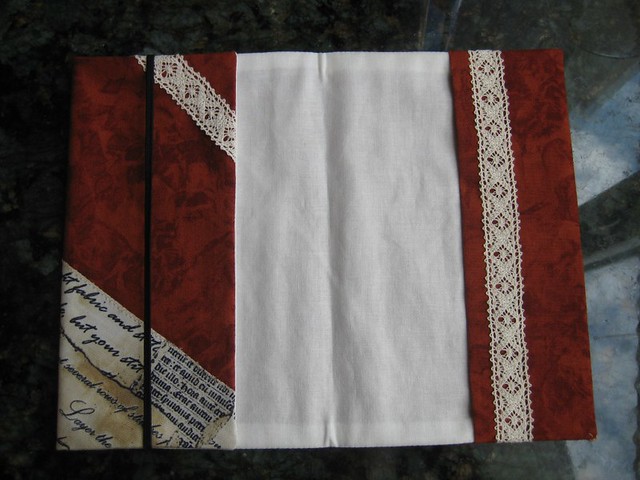
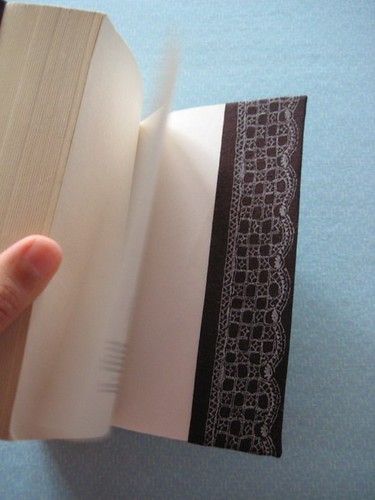
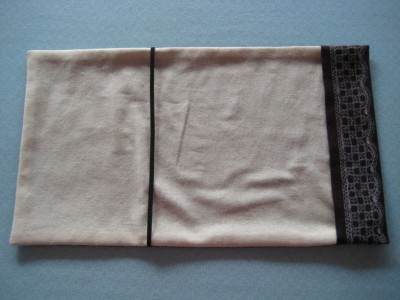
Mr Robots helped me pick the inside fabric. It’s the red serge from my two-tone skirt. I feared it would be two thick but it wasn’t, and the colors look great together. I also tested minor adjustment to my pattern, to allow for thicker books while still maintaining the folded side in place: putting two elastic bands instead of the only one that’s in the pattern. They’re placed on each side of the initial elastic. If use prove that it’s better I’ll post the details here.

My father seemed happy with his cover. And Mr Robots is almost jealous, he’s starting to think he should have asked for a fancier design for his cover. ;) If you want to make one yourself, you can find the tutorial here !

Two-tone skirt

Before I go back with more details to what happened in 2012, I’ll try not to be late with my 2013 projets. So here is my first completed project of the year. Also named the 2012-project-that-wouldn’t-end. ^^;

It’s the 135 skirt from Burda Style magazine 2012/08 (forgot to say in my last post that in 2012 I also got a subscription to Burda magazine) :

It does seem quite simple, doesn’t it? And still I started to trace to pattern during my first sewing lesson at the start of the school year and only completed it on February 3rd! Even if you don’t count the 5 lessons I missed for various reasons, the 4 weeks without lessons during school holidays and the 2 or 3 weeks during which I worked for Le Jour B instead of sewing for me, that’s still 9 or 10 3 hours sessions spent on this skirt! Okay, we don’t really work for full 3 hours because we have to get ready, pack our things at the end, and spend some time chatting with the other students or waiting for the teacher to be available if we have a question, but still. It’s way too much if you ask me! Hence the nickname…

I got the idea for this skirt in September, I thought it would be nice to make it a two-color skirt in autumn shades, with a fabric and length that would work for rainy days when I like to wear my boots. Since the orange I could find was too flashy, I chose dark red and brown cotton serge.

The firsts of this skirt:

  • first Burda pattern
  • first fitted skirt without a waist band (there is a waist facing)
  • first “real” invisible zipper with an invisible zipper foot. It’s still not perfect but it’s better than before (when I used a regular zipper foot).
  • first use of a serger during the sewing lessons (we have two!), to finish the bottom of the facing and the bottom of the skirt (the teacher feared it would be too bulky with a real hem so the end was just serged and folded once).
  • first patch pockets (and first pockets )

Technical details and pattern modifications :

  • according to their size chart I started with a size 36 at the waist and went to a size 40 at the hips. Since I wanted it as A-line shaped as possible I liked having a larger size at the bottom. It turns out their size 36 is quite large, because after I basted the skirt and tried it on we removed a few more centimeters at each seam between the waist and the hips (that’s when it’s useful to be with a teacher who can mark the changes while you’re wearing the skirt). That said, the picture and description were not clear as to where the skirt is supposed to sit: natural or low waist? We went with my natural waist.
  • I lengthened it, but I don’t remember how much
  • I didn’t place the pockets at the same height
  • the pocket flaps have been rounded instead of being rectangular shaped (but I kept the same measurements)
  • I didn’t sew the top sides of the flaps on 1cm as instructed. But I did three lines of stitching on the flap bottom part so that it would stay in place (see picture below)
  • I did a machine invisible hem, changing my thread color as the fabric changed.

At first I was supposed to add a lining but I ended up not adding it so that the skirt would be finished one week earlier. The teacher suggested I make a half or full slip to go under, which I think is a great idea because I’ll be able to use it with other pieces.

I have to say that towards the end I had grown quite sick of this project and couldn’t wait to be done with it. It was hard to keep on with it and not just toss it away somewhere. I’m glad I sticked to it though. Right after it was done I was a little bit disappointed, considering how long it took me (there is a tiny patterning problem after our changes at one place, I felt like I hadn’t done my best since I skipped the lining and it was less A-line that I would have wanted). But after wearing it several times I’m starting to like it, even if I don’t adore it. It might be duller than I had imagined, but it’s a very useful and practical skirt, that I will probably wear a lot more than my 50′s dresses that I love. ^^; I guess even if they’re less fun to make we need more basic pieces in our closet. I might add some embellishments to it later, we’ll see…

New book covers

I know I still have to share my findings from the flea market, but as you may have noticed, I have little free time lately. So I thought for now I’d show you two new book covers I made (tutorial can be found here).

The first one was made for my mother’s birthday. It’s not a recent project, as her birthday happened before Giveaway day. This cover and the one from the giveaway share a common base fabric. I chose this fabric for my mother’s because it’s actually a remnant she gave me a few years ago, so I thought the reference would be nice. And since I really liked it I decided to use it again as my basis for the giveaway.

This time I embellished the cover with appliqués in a parchment-like print. I love this other fabric, because of the old style lettering and the way it imitates pieces of old pages in random order. It’s a really nice text style print.

I also added lace to embellish the sewn-on fold, with a tiny leftover piece added in the opposite corner.

The second one I made for my husband.

As I already told you I have a friend coming over for sewing evenings once a week. She’s the one who bought this fabric at first, while I was trying to be reasonable and resisted the nice Japan inspired print. Of course she made a book cover with it. And when she showed it to my husband, he said he really liked that fabric and would very much enjoy a cover like that. What was I supposed to do? It’s not often he asks for something handmade. So I went back and bought some of this fabric. So much for being reasonable… His birthday was not long after so I made it for the occasion.

I used a fabric from the home dec section at Reine for the lining, and let me tell you, it’s perfect! It’s not too heavy or rigid, but it adds a nice body to the cover. It’s the best lining fabric I used so far! It’s cotton but I don’t remember the exact type, I’ll have to check again. If you make the cover from the tutorial, definitely try some heavier weight fabric to hold it better.

I didn’t have much to in terms of embellishments as the fabric is really nice as it is. I just was really careful with my pattern positioning to get the best of it, and enlarged the sewn-on fold to be sure that the whole motifs would show. To make it more personal I also added some tiny embroidery to the lining. It won’t show most of the time, but he will see it when he takes a new book, and he will know it’s there the rest of the time. It’s like a secret smile just for him. ^_^

I have a good length of fabric left, i hope to make good use of it (already have some ideas).

Surprise: fabric book cover tutorial!

Hello!

I’ve been working on this for a while, and now it’s ready: a tutorial to create a fabric book cover similar to the one I made for Giveaway Day! At first I was planning to have a “book cover” themed event for the blog’s three years anniversary with a book cover giveaway and this tutorial. In the end the giveaway was done a week before my blog turned three and the tutorial is up almost a week after. There is a kind of symetry to it…

This cover is quite simple as far as sewing goes, which makes it perfect for beginners and perfect for playing with cute fabrics and embellishments. Experienced people can have fun using more complex techniques for creating lots of different “tops”. It also makes a good gift for friends and family members. The one you see pictured here is the first one I made, to test the concept. I used it almost every day since.

I did my best to write a tutorial that would be nice to read and detailed enough so that beginners would be able to follow it. I also included variations and embellishments suggestions at the end. Because of that it’s a little on the long side, so I prefered making a downloadable pdf file rather than writing it directly on the blog. I tend to like pdf files over blog post tutorials anyway, they’re easier to access to when you need them at home.

download Book-cover-tutorial.pdf

If you use this tutorial I’d be more than happy to know what you think about it and to see your finished products! Please leave a comment here with a link to a post or a picture, or send me an email. :)

Giveaway Day!

Edit from 27/05/2012: the winner is Snoodles! Go check the full post here.

Edit from 26/05/2012: the giveaway is now closed! I’ll draw a winner and announce it here during the week-end. Thank you!

Here it is! Today is May 21st, also known as Giveaway Day! It’s also a big day for this blog as it moved and just got its own hosting and domain name. :) It had been in my mind for some time. At first I was thinking about doing it for it’s third birthday next week, but when I discovered the date of the new Giveaway Day I decided to rush things a little. It will be much easier to read, as the French and English versions are now separated (but it’s easy to switch between the two with the language buttons!). There might be a few things to tweek still, but I think I solved most minor problems that appeared after the move and this blog is ready for you. ^^ So, in honor of my blog getting back to life before its anniversary and getting its own domain, and also just because it’s fun, here is my giveaway for Giveaway Day. My first giveaway!

I’m offering a book cover that I made especially for this occasion. The pattern was inspired by similar book covers I saw in Japan. I’ve been using one myself since last summer (when I first drafted the pattern), and I have to say it’s very useful. I go to work by train each day, so I always carry a book in my bag, and they are now nice and protected thanks to this.

It is meant for small books (paperback books I think in English, right?). It’s based on French books but since the british/amercian books I own are smaller than my French ones, it should be okay for most books. The size is adjustable: there is a flap that you fold around the front of the book and then maintain with an elastic. That way you can still use the same cover even if you have books of different thicknesses. There is a bookmark that match the front fabrics so that you can find where you stopped easily. The cover can be washed: it’s made of different cotton fabrics (even the inside lining) and all have been prewashed to prevent shrinking.

So how can you win it? It’s very easy: just leave a comment on this post. Any comment will do, but if you want to leave something nicer, I’d love to read anything book-related: a book or author that you recommend and why, a book-related memory, when you enjoy reading the most, what style of litterature you prefer, a book-related accessory you like… If you do I will also find something book-related to share when I announce the winner. ^_^ Comments are open until early morning on the 26th (since it’s UTC+2 here) and the winner (randomly chosen) will be announced by the 27th. The giveaway is open to anyone anywhere in the world.

And make sure to go check all the other giveaways on Sew Mama Sew’s blog!

Pocket mirror pouch

Hello! Before I continue with another longer post with more things to read, I thought a picture sewing-related post was in order! Sadly I didn’t have enough time at the end of 2011 to make lots of nice handmade Christmas gifts, but I did manage to make one: a little pouch for a mirror I was giving to my sister for Christmas.

The shell fabric is a medium/heavy weight cotton for durability and sturdyness. The lining fabric is a Liberty Tana Lawn (I don’t know this print’s name), so that it’s pretty on the inside and soft against the mirror. The lining folds on the main fabric at the top to add a decorative band.

The front is embroidered and adorned with two buttons. One is purely ornamental and the other is also functional: the pouch closes with a loop that goes around the central button.

It is based on very simple shapes: both the shell and lining are made of one fabric rectangle folded and sewed on the sides. The lining rectangle is longer in order to make the band. I used the mirror package, which seemed quite tight, as a guideline for my measurements. Here is a picture of the pouch with its mirror:

My sister seemed quite pleased with her present, it made me happy. And because I’m sure your wondering where the cute little mirror came from: it was designed by Adolie Day for La Marelle.

Ribbon skirt

Today I’m sharing a simple skirt I made a few months ago. I didn’t want to post it for some time, because it’s not a totally completed project (I’ll explain why below), but since I’m wearing it a lot lately, I want to share it anyway.

It was a really simple project that I made without a pattern: a rectangle skirt with an elastic waist. The only trick is that since I wanted it to be really full at the bottom but not have a very thick waist, I made it a tiny bit more complicated that just a piece of fabric + an elastic. The skirt is made of two pannels cut in the whole width of the fabric. I started by gathering and attaching the skirt to a waistband about the size of my hips, and then added elastic inside this reduced waistband. It’s not as elegant as with a “flat” fixed waistband, but it’s more comfortable. ^^ The side seams are french seams and the hem is a machine-made invisible hem, for a nice finishing touch.

To make it a little bit fancier I decided to add a detachable bow of the same fabric. I think the shape of the finished skirt reminded me of the skirts japanese women tend to wear and that inspired the bow. It’s exactly the kind of details you see in japanese fashion that aren’t so common in western countries (I think). I love this girly touch, and the skirt looks different depending on whether I add the bow or not, more elegant or more casual. I’m really happy with this project even if it was quite simple. It’s a real pleasure to wear, I feel pretty and feminine in it. I wanted to make other accessories to try and create a whole look, but I haven’t done anything more yet. We’ll see if I add something in the future.

I got the fabric on sale in Japan a short time before I left for France, in 2009. The funny thing is that I was planning on using it quickly! ^^; I loved the embroidery/lace motif and the rich brown color. Since the fabric isn’t very thick (meaning it can be a little see-through) and it’s 100% cotton (meaning it will cling to my tights in winter), I had bought some lining fabric to go with it and line the skirt. And here comes the part where the skirt isn’t really done yet: I mixed up the steps when I attached the gathered skirt to the waistband, which made it impossible to add a lining properly. Since I didn’t want to undo everything, I decided to leave the skirt as is and make a separate petticoat/half slip (not sure if there’s a difference between the two words) with the lining fabric. And of course I still haven’t made it to this day. It’s not really needed for summer (the skirt isn’t that much see-through), so I guess I’ll make it this autumn if I need it. ;p

PS: the lovely shoes I’m wearing in those pictures come from Eram, I bought them on sale last winter. They’re made of three shades of brown (the last one being almost burgundy).

Work in progress

Two projects that might be a little ambitious, considering the time I can devote to sewing… ^^;

This is the franken-pattern of what I hope to be a lovely dress. The deadline for this is approaching quickly, I hope I can finish it on time! Please cross your fingers for me.

This should become a stole. Quite some work left to do, right? ^^; This is my first “big” crochet project. It makes me realize how much longer it takes to make something that way rather than sewing it. I somehow knew it would take long, but I didn’t know it would be that much! With some luck I’ll be able to show you the finished product before next year. I hope time does improve a lot when you get more experienced… ^^;

Charity bag

On Saturday is the launch of the Inspiration Japon charity sale for Japan. I had a busy schedule the past weeks so it was hard to find the time to sew, but I managed to finish (almost) on time! I’m happy to share with you my first bag from the Lisette japanese pattern book.

I wanted to make something useful and for which the buyer’s size wouldn’t matter. An accessory therefore seemed appropriate. The only constraint was that the object offered had to be related to Japan in some way (fabric, theme, pattern…). I wasn’t really inspired by my japanese fabrics for this, so I turned to my patterns and decided to try this bag. It seems quite popular in the french sewing community, I thought it would be a good occasion to try it. In a sense it was liberating to make this without anyone in mind, as I was able to just follow the pattern and instructions. I didn’t feel compeled to modify it to suit someone’s need in particular. I did add a lining though, as I feel such a bag wouldn’t be complete without it.

I got the fabrics from Ikea. I chose a dark yet joyful fabric for the outside, and a light coloured simple one for the inside. Both are cottons. I like the constract between the busy print and the lining fabric. Here is an inside out picture for you to see it better:

I didn’t have any problems with the pattern, it’s quite easy to construct, even if the gathers make it a little time consuming. The only difficult part was sewing the handle at the point where it’s attached to the body, as it’s quite think there because of the different layers of fabric. The stitching line is not as straight as I’d like it to be, but it is ok. All in all I’m quite pleased with it, and happy with the finishing I did. I tried my best so that the person who will get it would be happy with it. It’s a little stressful to know the bag will be bought by someone I don’t know, it feels like a big responsibility.

I took a picture where I hold the bag for size comparison. It’s bigger than what I first thought. Thanks to its size and the gathers, it can hold quite a lot of stuff, as you can see below:

I don’t feel like making another one right away, but since it’s not really difficult and the shape is nice, I guess this bag and I will cross paths again in the future. It’s not the kind of bag I’d think of buying, not really my usual thing, but it’s nice to make. And it’s good to change one’s habits sometimes.^_^

A small note

Sorry I didn’t write the past weeks, I have things to say but sad things happened and I wasn’t really on a writing mood.

To get slowly back, I wanted to add a side note about pattern Simplicity 2101: the ties at the shoulders are “fake”. They’re not part of the yoke, you just tie them on top. In the first picture I showed of the dress, it is shown without ties.

The good thing about this: you get two tops in one, since you can wear it with or without the ties. And you can use them to make sure your bra straps won’t show, since you can catch them in the ribbon and ties them to the yoke. I find it very useful with such a wide neckline.

The bad thing: I find they have a tendency to move (go too much to the back or the front of the dress) and untie themselves. I had to move them back or retie them several times during the day.

I like it better with them, especially since my yoke is not perfect at the shoulder seams. ^^;