Checker skirt

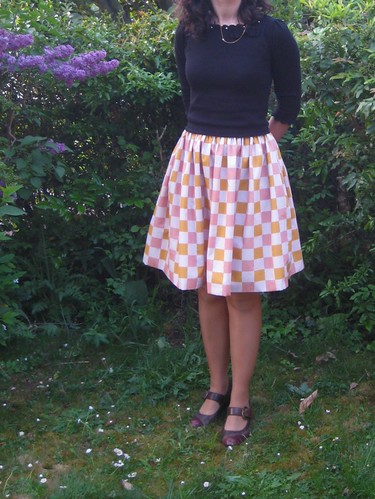
The project I’m showing today is quite special: I got the opportunity to test one of the first fabrics produced by french designer La Modette. :) I was so happy when Sandrine told me that I would be part of the first round of testers for her new fabrics! She liked the fabric I had picked and the project I suggested.  It’s the first time I take part in something like this, it was exciting but also a little bit stressful. It felt like such a huge decision when I started cutting into the fabric to make something out of it. ^^;

First fabrics from La Modette

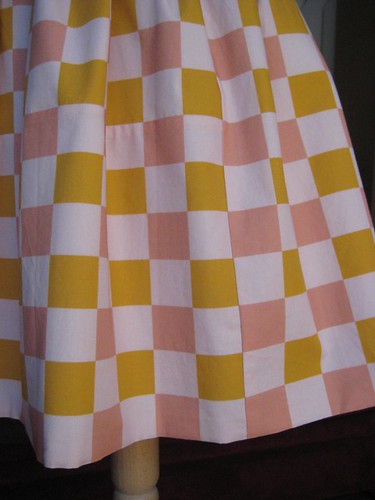
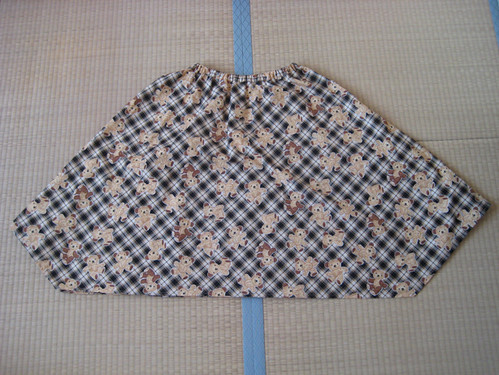
As you can see from the above picture (taken from La Modette’s facebook page with Sandrine’s permission), all fabrics from this first batch are really nice and colorful. I thought for a moment of making something with this umbrella print (cause umbrellas are fun and I still can’t forgive myself for not getting some of Alexander Henry’s April Showers print), but in the end I decided to stick with the checker print (which you can see better here) that had first caught my eye. Since I don’t have much available time lately (perhaps you’ve noticed?) I knew a simple project would be best. I thought I could make another skirt similar to my brown skirt with the lace print. It has few sewing lines and it’s based on rectangles, which would work well with that kind of print, and it’s a skirt I wear quite often so I’d probably make good use of another one in the same style.
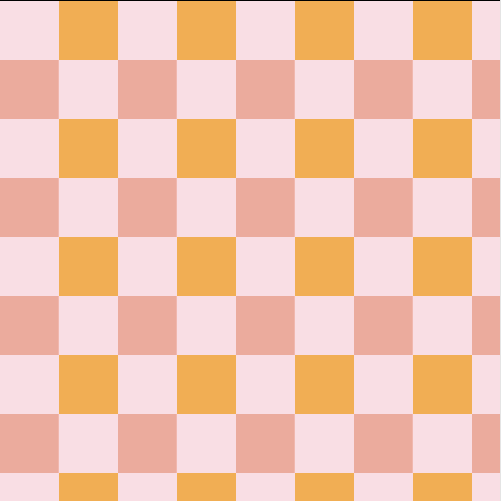
I realized it wouldn’t be so easy when I measured the fabric after washing it. I also measured my original skirt and here is how it went: my skirt has two 52×99 cm panels (not counting the seam allowances) and my fabric was 94x155cm. They was no way I could cut two panels high and large enough to make the same skirt. Since I didn’t want to chance the skirt shape, my only option was either to mix fabrics (I’m sure it would be nice mixed with a plain black) or patch smaller panels together to create the length I needed. I figured the skirt would be easier to coordinate if I didn’t add yet another color to it, so I went for the latter.
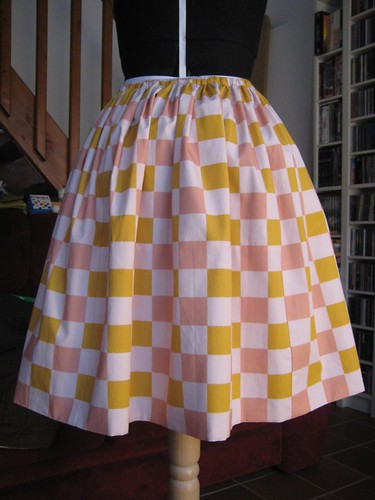
Une jupe puzzle...

Technical details:

  • I cut a first rectangle of 52 (+ sewing allowances) x 155cm, and made a second one measuring 52 x 50cm (+ allowances) by sewing together two smaller rectangles of 26 x 50cm (+ allowances). As a result 3/4 of the skirt don’t have any seams, and the last quarter has two vertical seams and an horizontal one around the middle. I did my best to sew on the squares to hide the seaming.
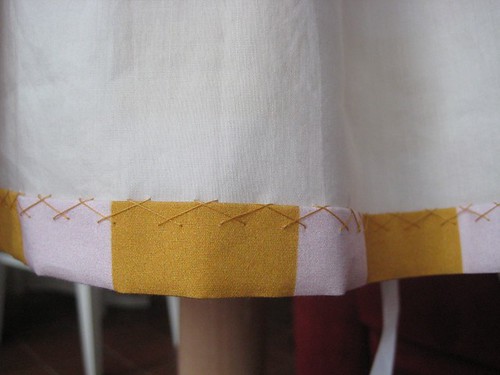
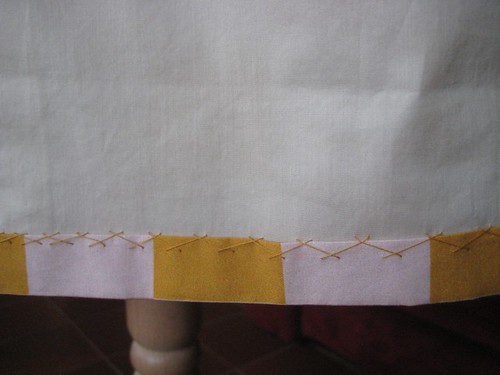
  • as the fabric is rather light I was concerned about show through so I decided to line the skirt in a very soft cotton fabric (maybe a blend?) I’ve had for some time. Maybe it wasn’t necessary, but it had the added benefit of providing another layer to catchstitch the hem to, so that I wouldn’t have any hem stitch showing on the right side.
  • the waistband is a simple 6cm height band folded and sewn with 1cm seam allowances, for an elastic band that was 1,5cm large. It was a little tight for the elastic but I think it may have to do with me not reducing my allowances after sewing.
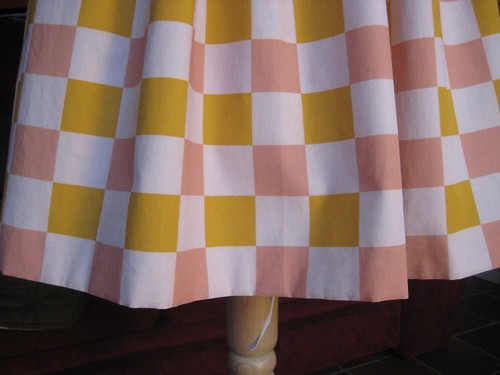
Nice invisible hemA nice hem without any stitches showing on the outside

So what about the fabric? As a tester I have to give my opinion about it (although it’s probably easier to review a pattern…). I found it nice and easy to use and found the colors to be really nice in real life too (at first on my computer I thought the light squares were white but they’re a sort of pale salmon pink). It creases normally for a cotton poplin. I prewashed it at 30°C, Sandrine says we can even wash it at 40°C. The colors didn’t fade or bleed. It seems the fabric shrank a little bit in the direction parallel to the selvage: the squares are supposed to be 4cm by 4cm according to the website, but mine were a tiny bit less high. The fabric doesn’t fray much. There was a tiny flaw in the print in one place, but I guess it happens sometimes. Unfortunately I saw it after I had already cut my pieces, but I managed to hide part of it by moving a seam a little bit and I don’t think it’s really noticeable on the skirt.
The good:

  • it was a great opportunity to take part in a nice project, test new fabrics, and promote and support a French creative woman.
  • the resulting skirt is fresh and cheerful.
  • I succeeded in getting the skirt I had planned, which has the right size, even if it seemed at first that I didn’t have enough fabric. It was an interesting challenge. The easy to match and regular motif clearly helped.
  • The motifs match almost perfectly at the seams.
  • I’m really proud of my catchstitched hem. I’m quite lazy usually when it comes to hand hemming, but I felt it would be a shame to ruin the lovely check motif with visible stitches. My stitches aren’t perfect, they’re still not quite regular, but it could have been worse, I’m getting better. It’s funny because they vary a lot in size at the beginning: first they were tiny as I was hesitant, and then as I got scared that it would take forever they got huge. XD After that I decided to be more focused and they got better.
  • The lining is super soft on my legs it’s a pleasure. :)

Isn't it nice?First stitches...First stitches: from tiny to huge

The not so good: I’m not entirely sure I made the best choices…

  • I should have cut to rectangles of 47cm by 102cm and add a band at the bottom rather that cut the right length and add a vertical band with a seam in the middle of it. It’s not balanced and even if the checks match from up close you can see the seams. And I’m afraid if might alter the way the skirt hangs.
  • I feel like the waist on this skirt is thicker than on my brown skirt. It’s probably because of the added lining and the fact that I didn’t cut the allowances.
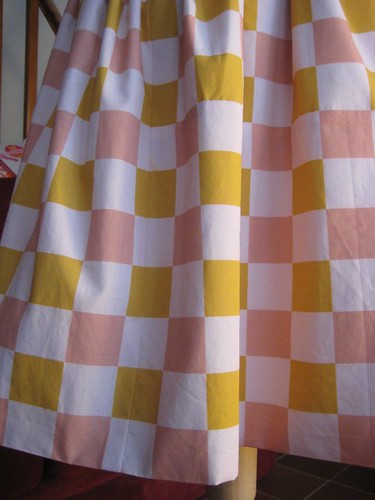
Can you spot the seams?

Mr Robots says he really likes this skirt, which he finds fresh, and he thinks it fits me well. I’m wearing it right now with a black tank top. The top is fitted so it’s hiding the elasticized waistband and makes the skirt flares a little bit more under it, it looks nice. I think it looks better like this than with the shorter top I used for my outdoor picture. And it made me think of another use for this fabric: a dress in the 20′s style, in black, with a flounce in this fabric at the bottom. What do you think, would it be nice ?
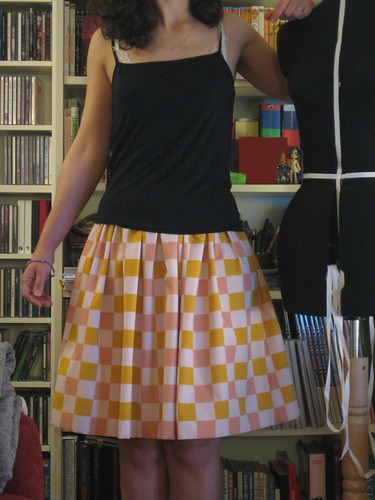
I still have a little bit of fabric that I’m keeping for the perfect use. I’m even thinking about getting more of this same print in the same colors to try another idea or two that I had during this project. So maybe you’ll see more checks here soon? What about you? Will you fall into check love (this fabric is available in several colorways)? What would you make with such fabric?

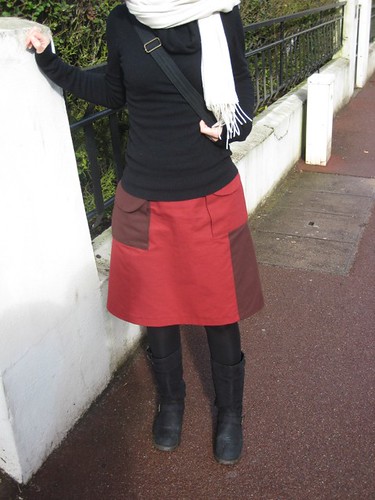
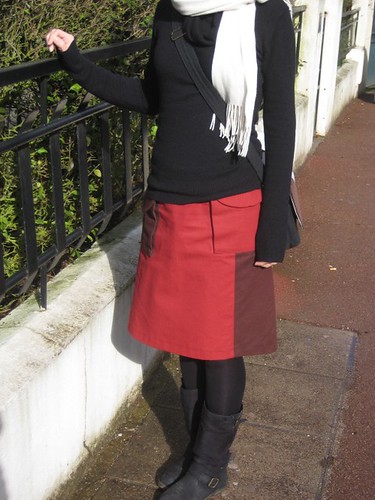
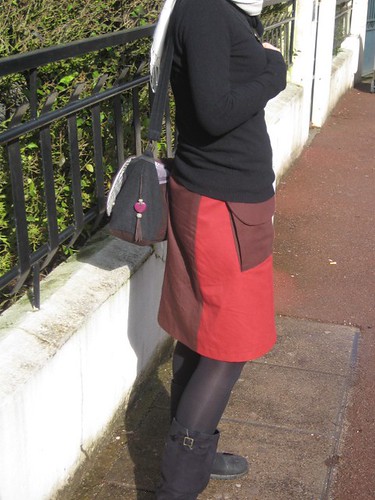
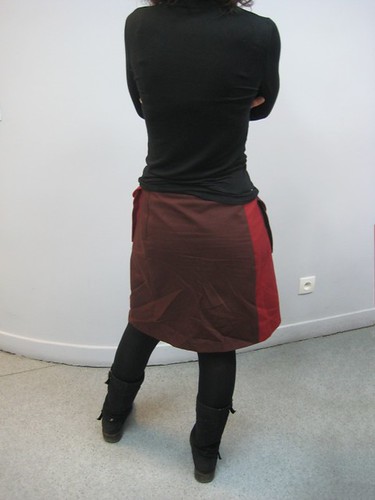
Two-tone skirt

Before I go back with more details to what happened in 2012, I’ll try not to be late with my 2013 projets. So here is my first completed project of the year. Also named the 2012-project-that-wouldn’t-end. ^^;

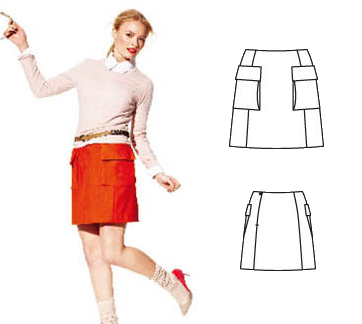
It’s the 135 skirt from Burda Style magazine 2012/08 (forgot to say in my last post that in 2012 I also got a subscription to Burda magazine) :

It does seem quite simple, doesn’t it? And still I started to trace to pattern during my first sewing lesson at the start of the school year and only completed it on February 3rd! Even if you don’t count the 5 lessons I missed for various reasons, the 4 weeks without lessons during school holidays and the 2 or 3 weeks during which I worked for Le Jour B instead of sewing for me, that’s still 9 or 10 3 hours sessions spent on this skirt! Okay, we don’t really work for full 3 hours because we have to get ready, pack our things at the end, and spend some time chatting with the other students or waiting for the teacher to be available if we have a question, but still. It’s way too much if you ask me! Hence the nickname…

I got the idea for this skirt in September, I thought it would be nice to make it a two-color skirt in autumn shades, with a fabric and length that would work for rainy days when I like to wear my boots. Since the orange I could find was too flashy, I chose dark red and brown cotton serge.

The firsts of this skirt:

  • first Burda pattern
  • first fitted skirt without a waist band (there is a waist facing)
  • first “real” invisible zipper with an invisible zipper foot. It’s still not perfect but it’s better than before (when I used a regular zipper foot).
  • first use of a serger during the sewing lessons (we have two!), to finish the bottom of the facing and the bottom of the skirt (the teacher feared it would be too bulky with a real hem so the end was just serged and folded once).
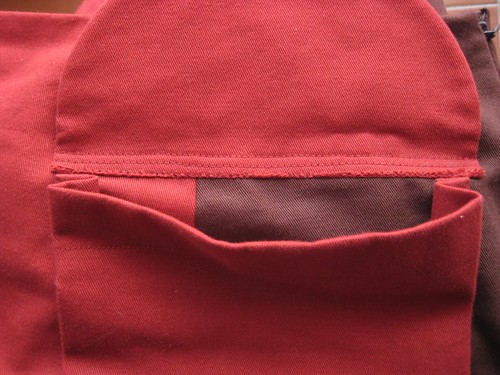
  • first patch pockets (and first pockets )

Technical details and pattern modifications :

  • according to their size chart I started with a size 36 at the waist and went to a size 40 at the hips. Since I wanted it as A-line shaped as possible I liked having a larger size at the bottom. It turns out their size 36 is quite large, because after I basted the skirt and tried it on we removed a few more centimeters at each seam between the waist and the hips (that’s when it’s useful to be with a teacher who can mark the changes while you’re wearing the skirt). That said, the picture and description were not clear as to where the skirt is supposed to sit: natural or low waist? We went with my natural waist.
  • I lengthened it, but I don’t remember how much
  • I didn’t place the pockets at the same height
  • the pocket flaps have been rounded instead of being rectangular shaped (but I kept the same measurements)
  • I didn’t sew the top sides of the flaps on 1cm as instructed. But I did three lines of stitching on the flap bottom part so that it would stay in place (see picture below)
  • I did a machine invisible hem, changing my thread color as the fabric changed.

At first I was supposed to add a lining but I ended up not adding it so that the skirt would be finished one week earlier. The teacher suggested I make a half or full slip to go under, which I think is a great idea because I’ll be able to use it with other pieces.

I have to say that towards the end I had grown quite sick of this project and couldn’t wait to be done with it. It was hard to keep on with it and not just toss it away somewhere. I’m glad I sticked to it though. Right after it was done I was a little bit disappointed, considering how long it took me (there is a tiny patterning problem after our changes at one place, I felt like I hadn’t done my best since I skipped the lining and it was less A-line that I would have wanted). But after wearing it several times I’m starting to like it, even if I don’t adore it. It might be duller than I had imagined, but it’s a very useful and practical skirt, that I will probably wear a lot more than my 50′s dresses that I love. ^^; I guess even if they’re less fun to make we need more basic pieces in our closet. I might add some embellishments to it later, we’ll see…

Ribbon skirt

Today I’m sharing a simple skirt I made a few months ago. I didn’t want to post it for some time, because it’s not a totally completed project (I’ll explain why below), but since I’m wearing it a lot lately, I want to share it anyway.

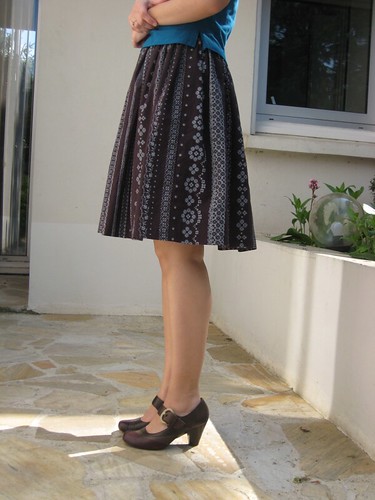
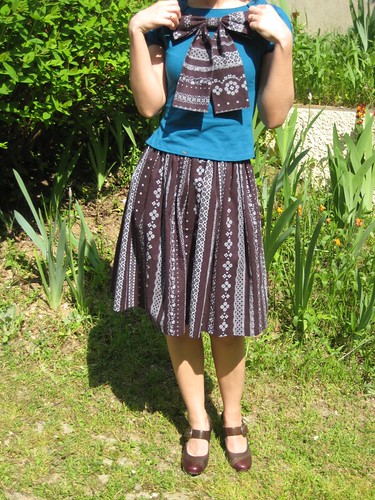
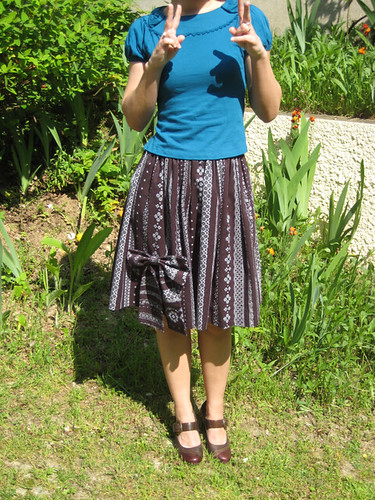
It was a really simple project that I made without a pattern: a rectangle skirt with an elastic waist. The only trick is that since I wanted it to be really full at the bottom but not have a very thick waist, I made it a tiny bit more complicated that just a piece of fabric + an elastic. The skirt is made of two pannels cut in the whole width of the fabric. I started by gathering and attaching the skirt to a waistband about the size of my hips, and then added elastic inside this reduced waistband. It’s not as elegant as with a “flat” fixed waistband, but it’s more comfortable. ^^ The side seams are french seams and the hem is a machine-made invisible hem, for a nice finishing touch.

To make it a little bit fancier I decided to add a detachable bow of the same fabric. I think the shape of the finished skirt reminded me of the skirts japanese women tend to wear and that inspired the bow. It’s exactly the kind of details you see in japanese fashion that aren’t so common in western countries (I think). I love this girly touch, and the skirt looks different depending on whether I add the bow or not, more elegant or more casual. I’m really happy with this project even if it was quite simple. It’s a real pleasure to wear, I feel pretty and feminine in it. I wanted to make other accessories to try and create a whole look, but I haven’t done anything more yet. We’ll see if I add something in the future.

I got the fabric on sale in Japan a short time before I left for France, in 2009. The funny thing is that I was planning on using it quickly! ^^; I loved the embroidery/lace motif and the rich brown color. Since the fabric isn’t very thick (meaning it can be a little see-through) and it’s 100% cotton (meaning it will cling to my tights in winter), I had bought some lining fabric to go with it and line the skirt. And here comes the part where the skirt isn’t really done yet: I mixed up the steps when I attached the gathered skirt to the waistband, which made it impossible to add a lining properly. Since I didn’t want to undo everything, I decided to leave the skirt as is and make a separate petticoat/half slip (not sure if there’s a difference between the two words) with the lining fabric. And of course I still haven’t made it to this day. It’s not really needed for summer (the skirt isn’t that much see-through), so I guess I’ll make it this autumn if I need it. ;p

PS: the lovely shoes I’m wearing in those pictures come from Eram, I bought them on sale last winter. They’re made of three shades of brown (the last one being almost burgundy).

Light summer skirt

I managed to get my skirt finished on Sunday morning. I was going to Tokyo that day, to see a doll event and join a friend, and I really wanted to be able to wear it for that. I didn’t get much sleep on Sarturday evening, but I was able to wear it as intended! ^^

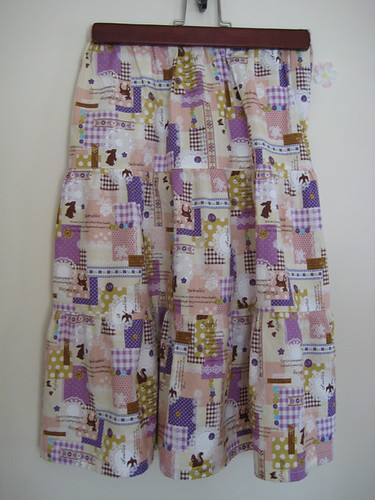
As you can see in the end I decided to make a tiered skirt. The simple square skirt with elastic waist that I had first planed seemed too simple for this light fabric. I sensed the skirt wouldn’t be so great. And what’s the point of making yourself a skirt, especially in a cute fabric, if in the end you get a “meh” skirt? The gathers give some shape to the fabric, so that it looks nice.

Since I had in my japanese sewing books a pattern for that kind of skirt, in approximately the length I wanted, I got lazy and just used the measures in the book to cut my fabric instead of computing everything myself. The pattern I used it taken from the book below, skirt number 16. I used the measurments for the S-M size (I’m wearing French size 36~38).

I did a few changes:- I did a real waistband for the waist instead of just folding the top of the top tier. I think it gives a more “finished” feeling, and it’s not much more complicated. Because of that I just added 1.5cm to the top for the seam.- I did a mistake when cutting my fabric, so the middle tier is slightly longer than on the pattern: maybe 2cm. The last tier might be slightly longer also since I don’t usually use 3cm for the hem. But all in all I don’t think the skirt is much longer.- the top tier was cut in one piece in the whole width of the fabric, so it’s slightly larger and has a seam only on one side.- I used french seams for all side seams. I discovered them with my teddy bear skirt and found then not that difficult and nice looking (plus they’re sturdier).- I used more elastic band that what they recommend because it didn’t feel comfy. I think I cut approximately the same size as my waist measurement.

Here is a picture where I actually where the skirt, so you can get a better idea of how it looks:

There is not much to say about the pattern, it’s very easy to make. The hardest part is gathering the different layers, because it takes quite some time. And I can’t seem to machine sew them as I’d like to. I think my stitches are too big at the beginning. But anyway it looks nice nonetheless. The skirt fits me. Maybe the fabric could be cut in bigger width to get more gathers and more puff, but it’s nice like this also.

That said, I feel like I’m not totally happy with my use of this fabric. I feel like it could have been better, I’m not as crazy and proud about this skirt as I’ve been with other things I made in the past. Maybe it seems too “normal”. I’m almost wondering “Why make this kind of skirts that is easy to buy?”. Of course I know why: I can use the fabric I want, make it in the size I want, it’s a good sewing training and I wouldn’t buy it anyway ’cause I’m not supposed to buy anything. So making it myself is nice and serves a purpose. But I don’t know… there’s something missing. That said, I really needed a “basic” skirt that would be okay to wear anywhere and wouldn’t be hard to cycle with (since I go everywhere by bycicle). I guess I’ll see in the future if she grows on me. And despite what I’m saying it’s really nice for summer, I’m always wearing it since I made it. ^^; Plus my husband really likes it!

I’m thinking of making a cute little white top to go with it (or several…). I’m sure it would look great, because there are some bright white motifs on the skirt. Maybe the C pattern from the Stylish Dress Book +alpha book? And I still have some of the same fabric I used for this skirt, I’m trying to find the perfect thing to make with it. Any suggestion?

PS: sorry for the bad pictures, it’s very cloudy here today…

Bear skirt

I should show more completed creations here, so that people don’t think that I just have a big mess of work in progress projects. I also happen to finish some of them sometimes! I still don’t have any real good picture of my flower dress to share with you, so I’ll show you something a little older : my teddybear skirt, named after the fabric I used.

The pattern comes from a japanese book. I don’t have it so I’m not sure which one it is. Might be this one. The clothes is this book are quite classic ones, and didn’t really interest me, except for this skirt. She was almost exactly what I’ve been wanting to make for some time! Long, but not too much wide, with corners at the bottom (see the picture bellow to understand). It looked really nice. And the pattern is really simple since it’s based on a half circle skirt with an elastic waist.

I fell in love with this fabric the first time I saw it. I love tartan/check fabrics. So when I went back to the shop later, after have discovered the pattern, and saw it again, I knew it would be perfect for the skirt! And I was right! I was happy to have an excuse to get it. ;p I love the mix of check and teddybear prints, with the elegant shape of the skirt. It might sound strange, but it definitely works! The fabric is not so thin but flowing, perfect for this skirt. It’s so light that sometimes I have the disturbing feeling that I’m not wearing anything… ^^;

The above picture was taken the first day I wore this skirt, when we went to Design Festa. The event was my motivation to make it. It looks really great with a fitted black top (to emphasize the waist and accentuate the retro feeling of the skirt) and those autumn colored tights.

In conclusion: this is a great pattern! Quick and very easy to make, for a result that is very comfortable to wear and looks pretty. My husband loves this skirt which he finds very feminine and elegant, and I totally agree. I think it will have little sisters (a skirt is a “she” in French).