First jersey piece

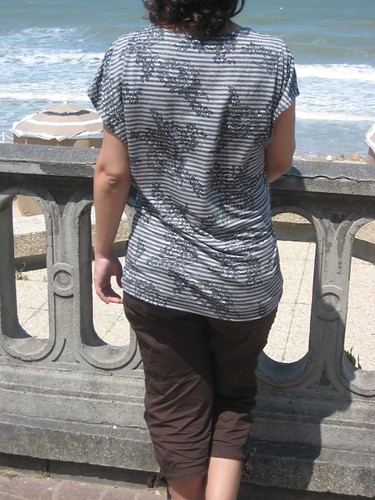
As promised here are a few pictures of my new top taken during our holidays. Looking at them makes me want to go back, it was so nice to enjoy the sea for a week and not have to worry about anything. It was the best way to start my maternity leave and forget about work.

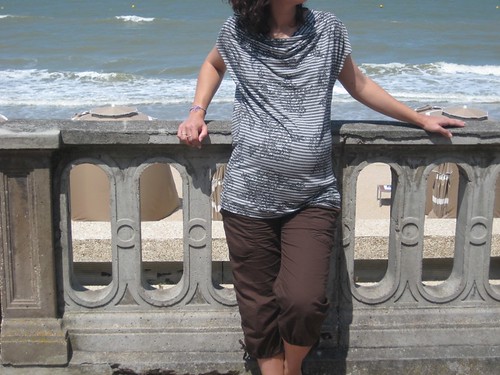
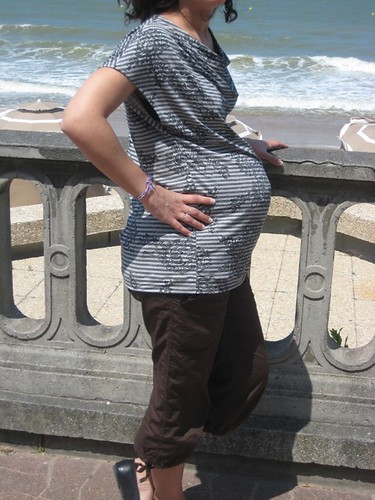
This top is actually quite simple, but it was my first piece made of jersey fabric, so it feels like an achievement. I’d been afraid of knit fabrics and had been avoiding them, except for the occasional dolly piece that I would sew by hand. That’s why I had made it one of my goals for this year’s sewing courses to start sewing with knits. At the beginning of June I realized I had very few time left to achieve this, since the lessons would end soon, so I stopped the project I was working on, went to a cheap fabric store in Paris to get a nice looking but inexpensive jersey and then went looking for an appropriate pattern in my Burda magazine collection. Since I didn’t have much time and because of my jersey fear I wanted something quick and simple. And if possible something that could accomodate my big belly. I settled on the 123-A top from Burda 2013/01.

If you’re considering making this top, please know that it’s quite large and long! I expected it, but not that much. I traced the pattern according to my maternity bust measurement, which is one size bigger than my regular size. But I think my regular size would have accomodated my 8 month pregnant belly without any problem! The top body is straigt so it’s quite roomy. Also the sleeve opening is quite large and low, so if you’re not wearing anything underneath your bra band will show when you lift your arms. Lately it’s been too hot in Paris for me to mind, but it’s not something I usually like.

This top was quite easy to sew, it makes me wonder why I waited so long to sew with knits! That said it’s a pretty forgiving project, since it’s very simple and not fitted. I started sewing it using the serger we have in the sewing class, and since I couldn’t complete it before the lessons ended I finished on my regular sewing machine, using its elastic stitches. And you know what? Everything went ok! The stitches might not be as nice looking as if I had used the serger all along, but it worked and my seams are stretchy and not too bad looking so it’s fine with me. I even used a twin needle to hem the bottom. It’s a little bit wavy, I don’t know if it’s because of the needle or the stitch settings. But with the busy fabric you don’t see it that much when I’m wearing the t-shirt.

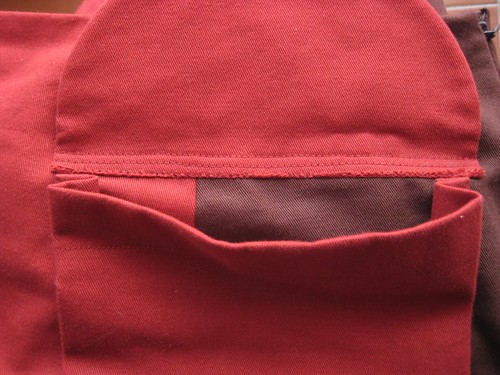
I was very careful when cutting my fabric to have it laying properly, so that the stripes wouldn’t be wonky, but I didn’t think about matching them at the sides… ^^; I guess I’ll do better next time. The intructions called for Vlieseline stabilmanche to stabilize the back neckline, shoulders and sleeve opening. Since I didn’t have any my teacher suggested I cut small bands in a bias tape and used those as stabilizers. It made the back neckline a tad too thick and rigid with all the layers, but it’s okay. I didn’t use any stabilizer on the sleeve openings though for fear they wouldn’t hang properly. Below is a picture of how the shoulder seams look like with the bias strip stabilizer.

So here it is, my first knit project! I feel more confident in using jersey now and would love to try other patterns. I’d like to make some fitted garments, which are more my style. But it’ll have to wait until I have the time. With all the things we had to do in the house to prepare for the baby’s arrival I’m only now finding the time to sew, and there are some more urgent things in my to-do list, like things for the baby for example. ^^ He might arrive any day now, I’d like to make a few things before that…

Two-tone skirt

Before I go back with more details to what happened in 2012, I’ll try not to be late with my 2013 projets. So here is my first completed project of the year. Also named the 2012-project-that-wouldn’t-end. ^^;

It’s the 135 skirt from Burda Style magazine 2012/08 (forgot to say in my last post that in 2012 I also got a subscription to Burda magazine) :

It does seem quite simple, doesn’t it? And still I started to trace to pattern during my first sewing lesson at the start of the school year and only completed it on February 3rd! Even if you don’t count the 5 lessons I missed for various reasons, the 4 weeks without lessons during school holidays and the 2 or 3 weeks during which I worked for Le Jour B instead of sewing for me, that’s still 9 or 10 3 hours sessions spent on this skirt! Okay, we don’t really work for full 3 hours because we have to get ready, pack our things at the end, and spend some time chatting with the other students or waiting for the teacher to be available if we have a question, but still. It’s way too much if you ask me! Hence the nickname…

I got the idea for this skirt in September, I thought it would be nice to make it a two-color skirt in autumn shades, with a fabric and length that would work for rainy days when I like to wear my boots. Since the orange I could find was too flashy, I chose dark red and brown cotton serge.

The firsts of this skirt:

  • first Burda pattern
  • first fitted skirt without a waist band (there is a waist facing)
  • first “real” invisible zipper with an invisible zipper foot. It’s still not perfect but it’s better than before (when I used a regular zipper foot).
  • first use of a serger during the sewing lessons (we have two!), to finish the bottom of the facing and the bottom of the skirt (the teacher feared it would be too bulky with a real hem so the end was just serged and folded once).
  • first patch pockets (and first pockets )

Technical details and pattern modifications :

  • according to their size chart I started with a size 36 at the waist and went to a size 40 at the hips. Since I wanted it as A-line shaped as possible I liked having a larger size at the bottom. It turns out their size 36 is quite large, because after I basted the skirt and tried it on we removed a few more centimeters at each seam between the waist and the hips (that’s when it’s useful to be with a teacher who can mark the changes while you’re wearing the skirt). That said, the picture and description were not clear as to where the skirt is supposed to sit: natural or low waist? We went with my natural waist.
  • I lengthened it, but I don’t remember how much
  • I didn’t place the pockets at the same height
  • the pocket flaps have been rounded instead of being rectangular shaped (but I kept the same measurements)
  • I didn’t sew the top sides of the flaps on 1cm as instructed. But I did three lines of stitching on the flap bottom part so that it would stay in place (see picture below)
  • I did a machine invisible hem, changing my thread color as the fabric changed.

At first I was supposed to add a lining but I ended up not adding it so that the skirt would be finished one week earlier. The teacher suggested I make a half or full slip to go under, which I think is a great idea because I’ll be able to use it with other pieces.

I have to say that towards the end I had grown quite sick of this project and couldn’t wait to be done with it. It was hard to keep on with it and not just toss it away somewhere. I’m glad I sticked to it though. Right after it was done I was a little bit disappointed, considering how long it took me (there is a tiny patterning problem after our changes at one place, I felt like I hadn’t done my best since I skipped the lining and it was less A-line that I would have wanted). But after wearing it several times I’m starting to like it, even if I don’t adore it. It might be duller than I had imagined, but it’s a very useful and practical skirt, that I will probably wear a lot more than my 50′s dresses that I love. ^^; I guess even if they’re less fun to make we need more basic pieces in our closet. I might add some embellishments to it later, we’ll see…