Do not forget the giveaway for La Modette’s fabric store, you have until tomorrow 10pm Paris time to enter (that’s 1pm pacific time I think)!
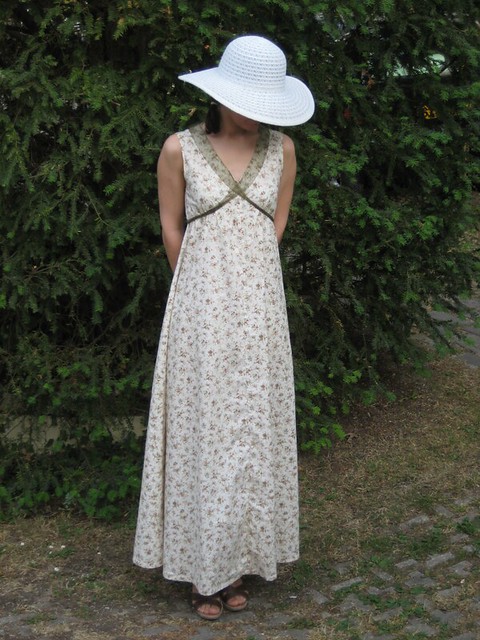
This dress was made a few year ago (I was still living in Japan!) and was never shown here, but I love it and with summer coming it’s a good time to finally share it. This project was born because we were invited to a “disco” themed party, which was a perfect excuse to finally make of those long and flowy dresses from the 70′s that I love. I browsed the web for inspiration (no Pinterest at the time, I had to save the pictures on my computer ;p ) and fell in love with this pattern drawing: McCall’s 4399.
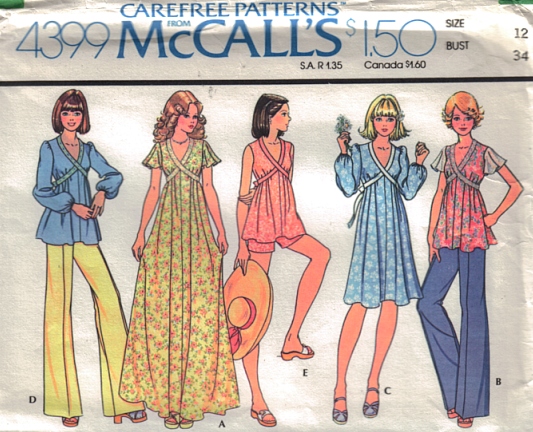
I didn’t want to order a pattern, so the plan was to make a dress similar to the maxi shown on the cover, using a pattern I already owned as a base. I didn’t have any vintage pattern at the time in my collection. Instead I turned to my collection of japanese pattern books, and found that the top of the I dress from the Stylish Dress Book had a similar top that I could use.
I used a picture from the envelope back as my guide for fabric requirements and the overall shape of each pattern piece and I went modifying my pattern to get the dress I wanted. In the end only the shoulders and armholes of the original pattern remain untouched. XD I changed the neckline to lower it and added lots of length to the top. The original pattern has a seam under the bust with a gathered skirt, mine doesn’t have any horizontal seam. However there are seams down the center front and center back since the botom of the dress was to wide for my fabric width. I was planning to add sleeves, but left them of at the last minute because of a lack of time. I did like the dress as it was so I left it like this.

I used a floral cotton fabric that wasn’t probably the best choice in terms of thickness and drape (it probably is light quilting cotton) but that I thought was nice in terms of print. Plus I didn’t have much time so I had to do with what I could find around me. Because of that fabric it might not be as flowy as it could be, and it’s not as light as I wished it was during very hot summer days, but I wear it all the same. I wear it every summer since I made it. For the neckline ribbon the pattern calls for “stretch lace or foldover flexi-lace”. I couldn’t find any so I used a sort of gauzy ribbon. Since it couldn’t follow the round neckline at the back I slightly gathered it. Now I think it wasn’t the best idea, but I’m too lazy to change that… ^^; If I make it again I’ll probably cut a fabric band the same shape of the dress neckline (kind of like a facing).
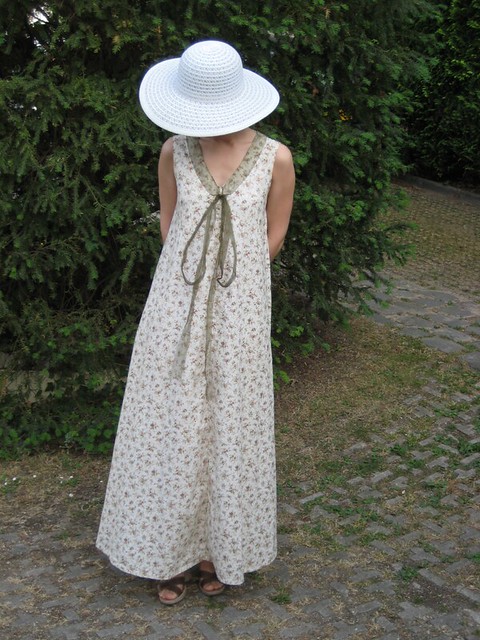
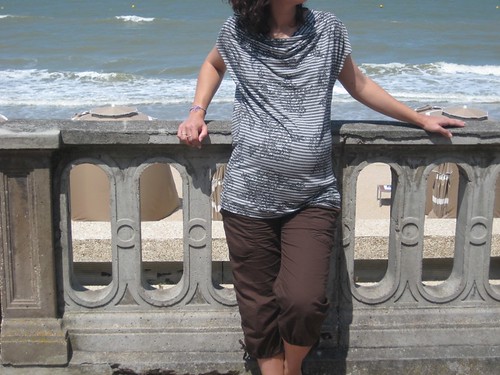
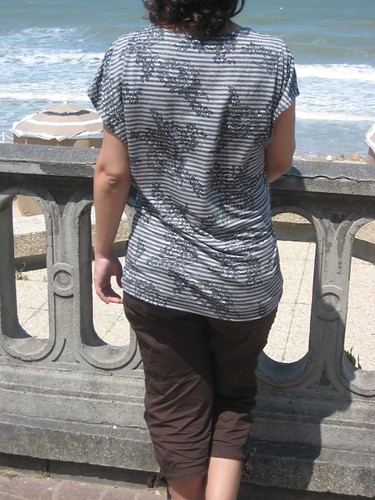
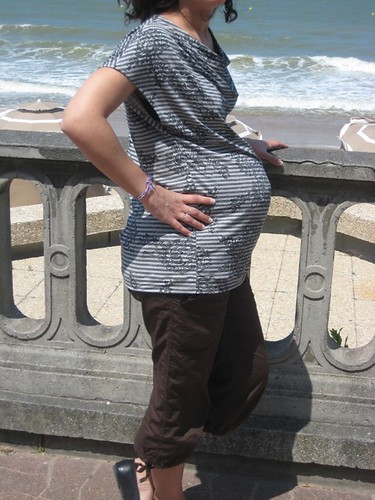
The funny thing is that this particular pattern is for a maternity dress. Of course I wasn’t pregnant at the time but I didn’t mind and I don’t think the resulting dress screams “maternity”. But I was super happy to have it when I was indeed pregnant last year. ![]() It was indeed perfect, as you can see in the following pictures.
It was indeed perfect, as you can see in the following pictures.
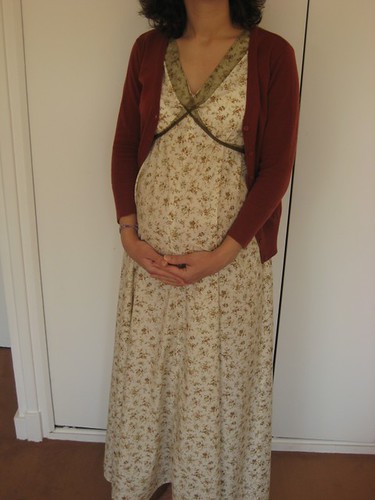
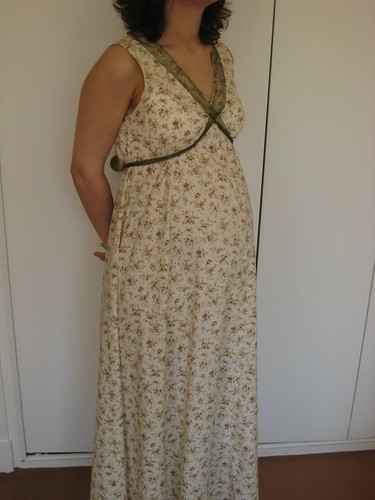

Overall I’m quite happy with this dress. I love that it is quite comfortable because of the tent shape (I can even tie the ribbon at the front to remove the empire waist) but still feels feminin. Sure it has flaws but at the time I made it I didn’t have that much sewing experience and I was super proud to be able to make it by altering another pattern. ![]() It’s quite nice to wear. I’ll probably make other(s) in the same style, either maxi length like this or shorter.
It’s quite nice to wear. I’ll probably make other(s) in the same style, either maxi length like this or shorter.
Firsts I remember for this project:
- first vintage style garment
- first time hacking a pattern