Before I go back with more details to what happened in 2012, I’ll try not to be late with my 2013 projets. So here is my first completed project of the year. Also named the 2012-project-that-wouldn’t-end. ^^;
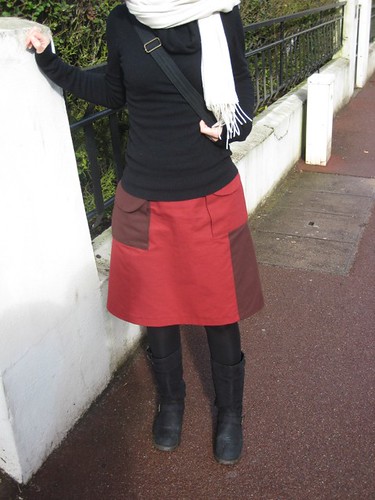
It’s the 135 skirt from Burda Style magazine 2012/08 (forgot to say in my last post that in 2012 I also got a subscription to Burda magazine) :
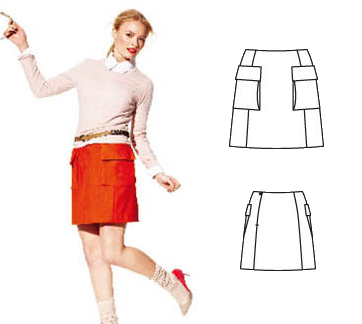
It does seem quite simple, doesn’t it? And still I started to trace to pattern during my first sewing lesson at the start of the school year and only completed it on February 3rd! Even if you don’t count the 5 lessons I missed for various reasons, the 4 weeks without lessons during school holidays and the 2 or 3 weeks during which I worked for Le Jour B instead of sewing for me, that’s still 9 or 10 3 hours sessions spent on this skirt! Okay, we don’t really work for full 3 hours because we have to get ready, pack our things at the end, and spend some time chatting with the other students or waiting for the teacher to be available if we have a question, but still. It’s way too much if you ask me! Hence the nickname…
I got the idea for this skirt in September, I thought it would be nice to make it a two-color skirt in autumn shades, with a fabric and length that would work for rainy days when I like to wear my boots. Since the orange I could find was too flashy, I chose dark red and brown cotton serge.
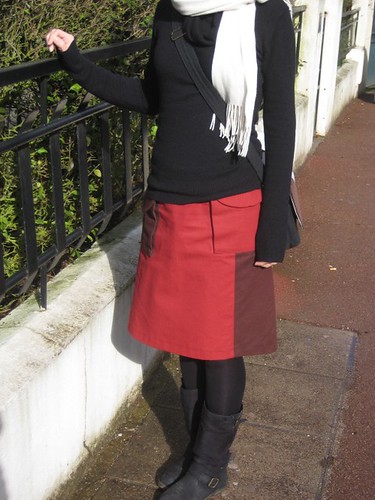
The firsts of this skirt:
- first Burda pattern
- first fitted skirt without a waist band (there is a waist facing)
- first “real” invisible zipper with an invisible zipper foot. It’s still not perfect but it’s better than before (when I used a regular zipper foot).
- first use of a serger during the sewing lessons (we have two!), to finish the bottom of the facing and the bottom of the skirt (the teacher feared it would be too bulky with a real hem so the end was just serged and folded once).
- first patch pockets (and first pockets )
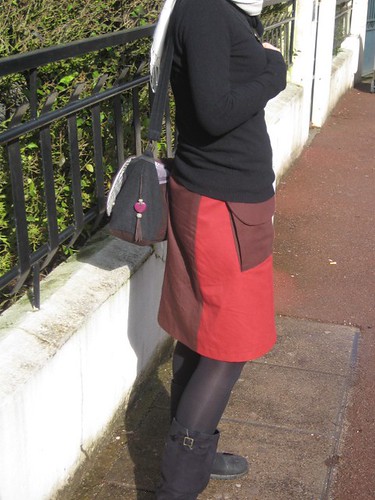
Technical details and pattern modifications :
- according to their size chart I started with a size 36 at the waist and went to a size 40 at the hips. Since I wanted it as A-line shaped as possible I liked having a larger size at the bottom. It turns out their size 36 is quite large, because after I basted the skirt and tried it on we removed a few more centimeters at each seam between the waist and the hips (that’s when it’s useful to be with a teacher who can mark the changes while you’re wearing the skirt). That said, the picture and description were not clear as to where the skirt is supposed to sit: natural or low waist? We went with my natural waist.
- I lengthened it, but I don’t remember how much
- I didn’t place the pockets at the same height
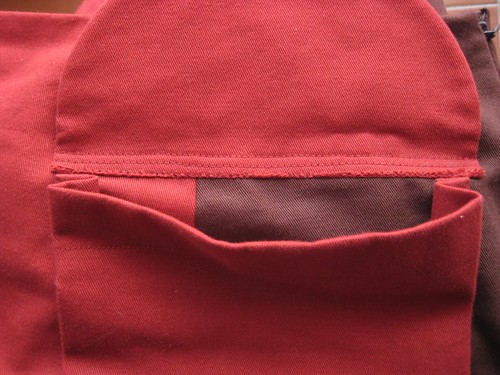
- the pocket flaps have been rounded instead of being rectangular shaped (but I kept the same measurements)
- I didn’t sew the top sides of the flaps on 1cm as instructed. But I did three lines of stitching on the flap bottom part so that it would stay in place (see picture below)
- I did a machine invisible hem, changing my thread color as the fabric changed.
At first I was supposed to add a lining but I ended up not adding it so that the skirt would be finished one week earlier. The teacher suggested I make a half or full slip to go under, which I think is a great idea because I’ll be able to use it with other pieces.
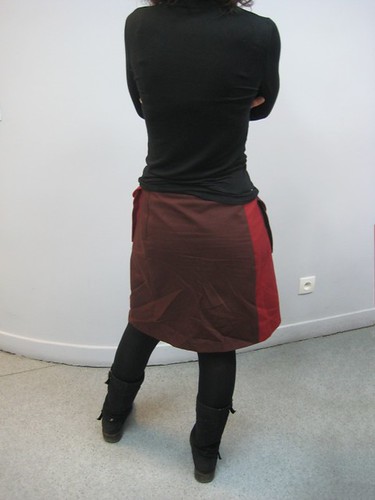
I have to say that towards the end I had grown quite sick of this project and couldn’t wait to be done with it. It was hard to keep on with it and not just toss it away somewhere. I’m glad I sticked to it though. Right after it was done I was a little bit disappointed, considering how long it took me (there is a tiny patterning problem after our changes at one place, I felt like I hadn’t done my best since I skipped the lining and it was less A-line that I would have wanted). But after wearing it several times I’m starting to like it, even if I don’t adore it. It might be duller than I had imagined, but it’s a very useful and practical skirt, that I will probably wear a lot more than my 50′s dresses that I love. ^^; I guess even if they’re less fun to make we need more basic pieces in our closet. I might add some embellishments to it later, we’ll see…

Salut lholy,
Cette jupe est adorable, j’adore ton choix de tissu ! En voyant le résultat final, on n’imagine pas les petites galères que tu as pu avoir ^^ J’ai hâte de voir tes futurs projets.
Merci beaucoup, c’est super gentil !
Je la trouve vraiment superbe! Tres bon choix de couleurs et meme si elle t’a pris beaucoup de temps, elle est super reussie ^^
(Pour l’anecdote, mon cheri qui est a cote de moi vient de decreter que ta jupe est top et qu’il faut absolument que j’en ai une comme ca :p)
Merci beaucoup ! Et merci à ton chéri pour son enthousiasme. ^^ En réalité elle n’est pas très compliquée, l’étape la plus “difficile” c’est si tu veux reprendre les coutures côté pour qu’elle soit bien sur mesure. Je suis curieuse de voir ta version si jamais tu décides de la faire.
Et ben moi j’adore. Je trouve la forme très jolie, je pense que plus trapèze, j’aurais moins aimé. ^^ J’aime les 2 grandes poches plaquées aussi. J’avais pas remarqué qu’elles étaient asymétriques, mais maintenant je ne vois plus que ça, lol.
LOVE IT !!!
You were right to stick with it, in the end it is super nice!
Thank you! ^_^
Pingback: Japan-inspired book cover n°2 | Anomori ~ アメリの森