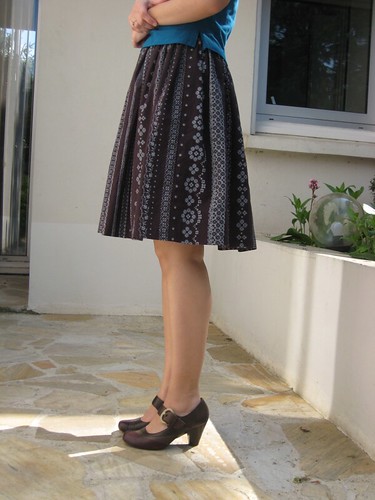
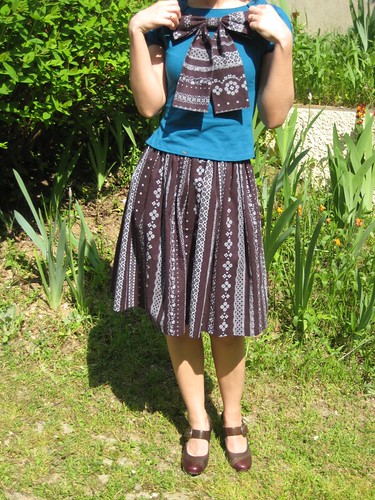
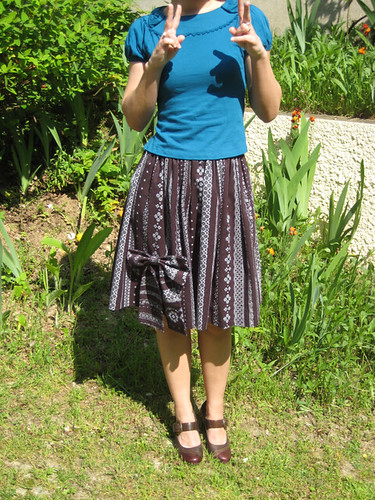
Today I’m sharing a simple skirt I made a few months ago. I didn’t want to post it for some time, because it’s not a totally completed project (I’ll explain why below), but since I’m wearing it a lot lately, I want to share it anyway.
 It was a really simple project that I made without a pattern: a rectangle skirt with an elastic waist. The only trick is that since I wanted it to be really full at the bottom but not have a very thick waist, I made it a tiny bit more complicated that just a piece of fabric + an elastic. The skirt is made of two pannels cut in the whole width of the fabric. I started by gathering and attaching the skirt to a waistband about the size of my hips, and then added elastic inside this reduced waistband. It’s not as elegant as with a “flat” fixed waistband, but it’s more comfortable. ^^ The side seams are french seams and the hem is a machine-made invisible hem, for a nice finishing touch.
To make it a little bit fancier I decided to add a detachable bow of the same fabric. I think the shape of the finished skirt reminded me of the skirts japanese women tend to wear and that inspired the bow. It’s exactly the kind of details you see in japanese fashion that aren’t so common in western countries (I think). I love this girly touch, and the skirt looks different depending on whether I add the bow or not, more elegant or more casual. I’m really happy with this project even if it was quite simple. It’s a real pleasure to wear, I feel pretty and feminine in it. I wanted to make other accessories to try and create a whole look, but I haven’t done anything more yet. We’ll see if I add something in the future.
I got the fabric on sale in Japan a short time before I left for France, in 2009. The funny thing is that I was planning on using it quickly! ^^; I loved the embroidery/lace motif and the rich brown color. Since the fabric isn’t very thick (meaning it can be a little see-through) and it’s 100% cotton (meaning it will cling to my tights in winter), I had bought some lining fabric to go with it and line the skirt. And here comes the part where the skirt isn’t really done yet: I mixed up the steps when I attached the gathered skirt to the waistband, which made it impossible to add a lining properly. Since I didn’t want to undo everything, I decided to leave the skirt as is and make a separate petticoat/half slip (not sure if there’s a difference between the two words) with the lining fabric. And of course I still haven’t made it to this day. It’s not really needed for summer (the skirt isn’t that much see-through), so I guess I’ll make it this autumn if I need it. ;p
 PS: the lovely shoes I’m wearing in those pictures come from Eram, I bought them on sale last winter. They’re made of three shades of brown (the last one being almost burgundy).


I think your skirt is just lovely! The bow is so pretty and adds that little extra touch….and the shoes!!Well done.
Thank you very much!
J’adore j’adore j’adore cette jupe !! Elle te va trop bien (et je suis trop contente d’avoir la voir en vrai et te le dire en vrai aussi :p)Et les chaussures, j’adore aussi évidement, mais ça tu sais déjà aussi !!(Like, like, like this skirt !! And the shoes of course !!)
Merci beaucoup ! ^^Je suis bien contente de les avoir prises ces chaussures, je les utilise régulièrement.
PS. Manque un “pu” à “avoir pu la voir en vrai”PPS. Très sympa ce haut avec !!
The skirt is so pretty. The fullness is just perfect with that lovely bow
Thank you very much! ^^
Très joli ! Et j’aime beaucoup l’idée du noeud.
Merci !
I love your blog and inspires me to keep working on mine.Your outfit is fantastic and super original.Thank you for inspiring.
Très, très jolie! j’adore l’idée du noeud, très féminin!
Merci beaucoup ! ^_^
J’aime beaucoup ta jupe, je voudrais te poser une question parce que je ne comprends pas quelque chose. Les deux panneaux ont-ils été coupés dans une seule largeur ou chaque panneau fait-il une largeur ? En gros, ton rectangle fait-il 70 ou 140 cm de longueur ? Je pose la question parce que je débute avec les fronces et j’ai du mal à me figurer la réponse toute seule. Merci d’avance de ta réponse.
Merci ! En fait comme mon tissu n’était pas très large (dans les 110cm de large) et que je voulais quelque chose d’assez ample sur le bas j’ai coupé deux rectangles qui faisaient toute la largeur de mon tissu et la hauteur désirée pour ma jupe + les valeurs de couture et d’ourlet. Donc deux rectangles de 110cm de long environ. Avec un tissu en 140 ou 150 de large c’est possible de juste faire un grand rectangle prenant toute la largeur du tissu. C’est la solution la plus simple et rapide. Mais du coup tu as moins d’ampleur sur le bas, vu qu’au final avec mes deux rectangles dans mon tissu plus petit ma jupe fait dans les 2m et quelques de circonférence en bas. Du coup si tu veux quelque chose de plus large (comme ce que j’ai avec cette jupe) tu peux quand même découper deux rectangles de 100 ou 110 de long dans un tissu en 140/150.
Pingback: Checker skirt | Anomori ~ アメリの森