50′s dress: photos

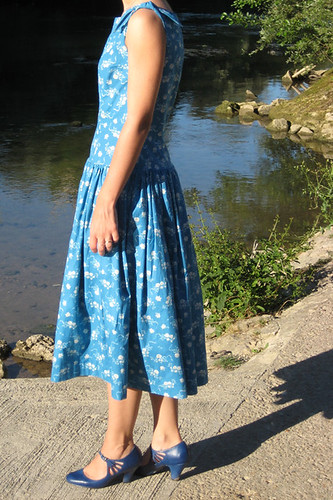
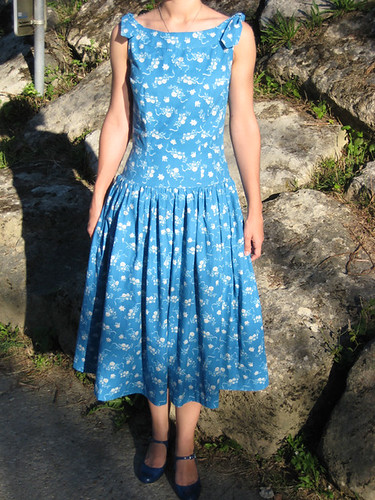
Here are the pictures! ^^ We did a little photoshoot last Sunday.

This dress was quite a challenge! First, because I had a firm deadline for it. That’s not a good idea. When you start you’re very confident, thinking you have plenty of time, and then things happen, you realize you have to make a lot of alterations to the pattern, and suddenly you’re late. Because the bad joke was that the pattern is too big! Seems it’s not my size after all. I see several possible reasons: converting my measurements from cms to inches, matching with the closest (but not exact) measurements on the pattern sheet, choosing a vintage pattern rather than a modern one… And now the result is here: it’s too big, and I got several patterns in the same size! Gertie wrote a post on finding the good vintage pattern size (which I saw afterwards…), in which she suggests you use your high bust measurement and not your regular bust measurement. Anyway next time I’ll order one size smaller!

So in the end a lot of changes had to be made: I took in a few cms in the middle of the back and front pieces, at the sides, at the shoulder seams of the yoke… Because of that I had to redraw the armhole, and with no notions of pattern altering it was a little scary. I made a musling of the Simplicity pattern (top of the dress), which seemed okay, but in the end I find that my dress is a tad too big. The waist and hips could be more fitted. I wonder if I did something wrong or if the fit could have been changed by adding the skirt. I saw in another vintage pattern (for a real dress) that they add a grosgrain ribbon as a waist stay, I’ll try that and see if it’s better. Another alteration I did was to change slightly the placement of the side zipper: it’s supposed to be at the bottom of the blouse, but for a dress I thought it would be better to have it at the top, just under the arm. The last thing that happened, which I hadn’t planned, was with the armhole. They say to finish it with bias tape, but it was just impossible for me! I couldn’t turn it around. I had to draw and add shaped facings instead.

Now let’s talk about the good things! I’m really happy I made this dress. And doing this lead to many first times:- first 50′s dress (and first garment made from a vintage pattern!)- first invisible hem (done with my sewing machine)- first lapped zipper done with my sewing machine- first close-fitting garment (and first time sewing darts)- first gathers done with my sewing machine. I didn’t use a gathering foot to make the whole gathers by machine, but I basted the gathering threads by machine. It was quicker and the gathers are more regular than when I do it by hand!I even used my sewing books four times: for the armhole facings (to do them perfectly), for the zipper, for the invisible hem and for machine gathering. It’s nice to feel you’re making progress.

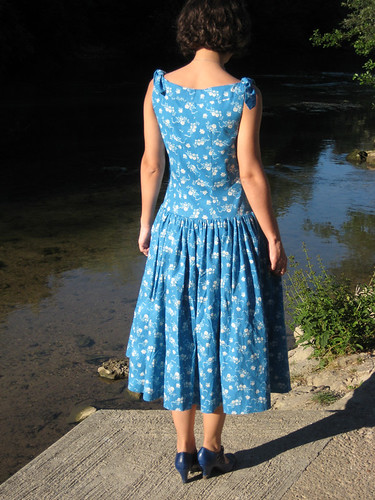
50′s dress

I’m back! Many things happened after my last post that prevented me from sewing as much as I wanted and bloging. Some nice things, like birthdays or friends visiting, and some not as nice, like a cold and headaches (I’ll let you decide where “working late” belongs). But in the end my last project was completed, on time for the wedding it was intended for, which was last Saturday.

I don’t have nice pictures of the dress on me yet, so this is the only picture you’ll get for now. My challenge was to make a pretty dress from the 50′s. I had decided that for this wedding I’d make my dress myself. And since it had to be nice and elegant (I lile to be dressed up for weddings, in honor of the bride and groom and to make it a special day), I logically turned to the 50′s. To me women clothing of that decade is the most elegant and feminin.

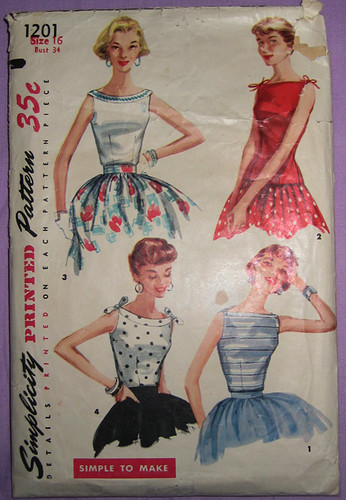
For this dress I used view 4 of the pattern shown in my last post, which is actually a blouse pattern. It’s Simplicity 1201. I’ve had my eyes on it for some time, I like its fitted shape and the different necklines. All variations are really nice. When I found it for sale in what seemed to be my size while I was looking for my dress pattern, I decided to get it and transform it into a dress by adding a skirt.

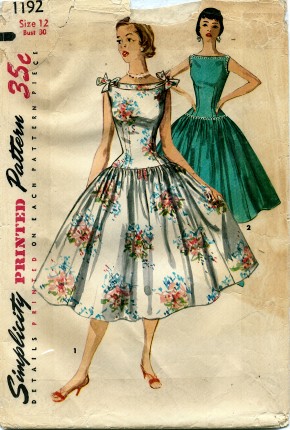
A few days later while browsing through the pattern pics I saved on my computer I realised there actually was a pattern that was exactly what I wanted to make (picture from the Vintage Pattern Wiki):

I did a little research online to try to get more information. Camelia Crinoline has this pattern and made the dress, you can find it here. She very kindly answered my questions about the fabrics and measurements.

After that the challenge was to find the right fabric. I was one of the two bridemaids and we wanted to match as well as look ok with the bride without wearing the same color as her (navy). Turns out it’s really not easy to find a nice blue fabric that is not navy, baby blue or turquoize. I finally found this one in Dunkirk, and I’m really happy with it.

I hope to show you more pictures later, along with construction details. In the meantime, if you’re interested in vintage clothes you can go check Sew Retro. It’s a collective blog about vintage sewing.

Accessory

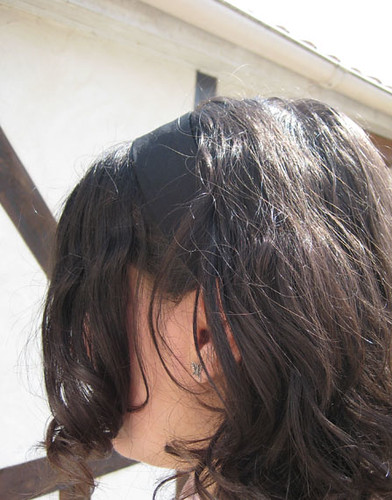
As you can see, I don’t have much free time lately… The new life I started in France is very time consuming. So when I finally got a few hours to spend sewing, I decided to do something quick and simple: something with instant gratification. I decided to make something pretty for my hair: a headband adapted from the Pochee magazine (vol.8).

(not easy to photograph a black headband on dark hair…)

I reduced the size because I now have shorter hair and wasn’t sure a very large one would fit me. I had lots of embellishment ideas, but in the end I went for something that would be easy to coordinate. I added two black yo-yos made in the same fabric as the main part.

And now that I know it fits me I can make other versions, changing fabric and adding other embellishements! Which is great, because with shorter hair I don’t have that many hairdo options (I miss my long hair sometimes).

Projects

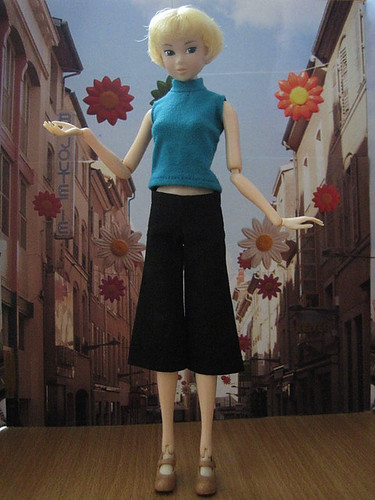
今、ドールショウのためのパターンを作っています。こちらはmomokoのショートパンツのサンプルです↓

ドールショウのために、しなければならない多くの仕事があります。がんばります!

On November 1st I’ll be taking part to what is possibly the biggest doll event in Tokyo. I’ll be there as a seller. At first I reserved a booth to sell for other people, some foreigners that I know from the dolly world who would like to sell there but couldn’t come themselves. And then I thought that since I would be there anyway, I could try to sell for myself also! It was kind of a “now or never” moment, and I didn’t want to have regrets…

For the moment it’s rather scary and stressful, since I’m behing on my schedule. I have no idea if I’m going to make it on time or not, and what I’ll have to sell on the booth. And I’m not talking about whether it will sell or not! Especially since the other brands I will sell are very well known and high quality. :s As a consequence I don’t sleep much currently, and that’s partly why I didn’t post so much. I’m posting more often now, but I’m not sure how long it will last… ^^; Please bear with me until November 2nd. The picture above is one of the patterns I’m working on: short pants.

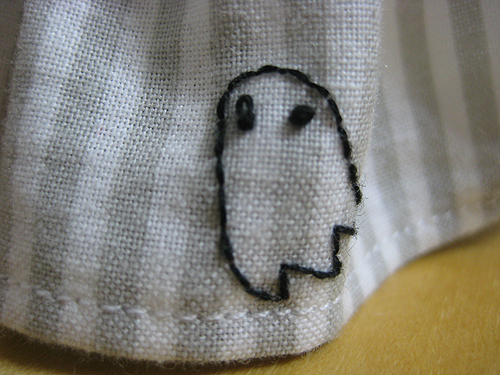
Ghost in progress

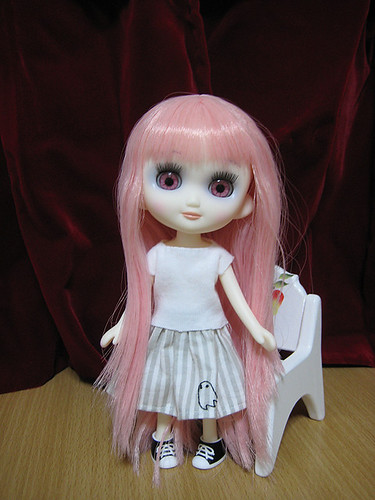
Here is what was hidden behind one of the “current projects” picture…

The whole outfit (except shoes) is made by me. But for real this is just a work in progress, the outfit isn’t done yet. You shouldn’t be able to guess it with this pic (if I did my job right), but it is. First, the threads on the top haven’t been trimed yet. And I’m not 100% satisfied with how the back turned out, I might try to redo it during the week-end. And the outfit is missing a piece to really be decent. But it already looks cute like that (on picture ;p ), and I wanted to show it, so here it is! Hopefully I’ll have pictures of the completed outfit to show by Sunday evening.

Some of my current projects…

Here are a few simple pictures to come back slowly, before I start talking a lot again.

I hope you had a wonderful summer so far (after all it’s not over yet) and that the new start at work/school is going okay. See you soon with new books, patterns and I hope completed projects!

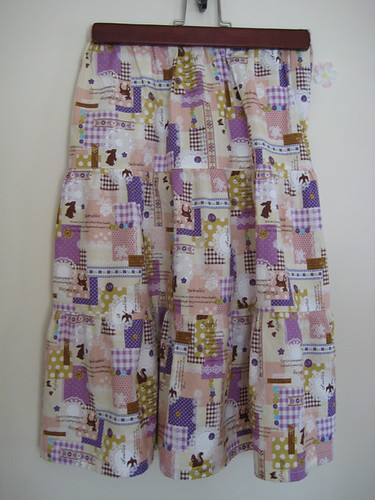
Light summer skirt

I managed to get my skirt finished on Sunday morning. I was going to Tokyo that day, to see a doll event and join a friend, and I really wanted to be able to wear it for that. I didn’t get much sleep on Sarturday evening, but I was able to wear it as intended! ^^

As you can see in the end I decided to make a tiered skirt. The simple square skirt with elastic waist that I had first planed seemed too simple for this light fabric. I sensed the skirt wouldn’t be so great. And what’s the point of making yourself a skirt, especially in a cute fabric, if in the end you get a “meh” skirt? The gathers give some shape to the fabric, so that it looks nice.

Since I had in my japanese sewing books a pattern for that kind of skirt, in approximately the length I wanted, I got lazy and just used the measures in the book to cut my fabric instead of computing everything myself. The pattern I used it taken from the book below, skirt number 16. I used the measurments for the S-M size (I’m wearing French size 36~38).

I did a few changes:- I did a real waistband for the waist instead of just folding the top of the top tier. I think it gives a more “finished” feeling, and it’s not much more complicated. Because of that I just added 1.5cm to the top for the seam.- I did a mistake when cutting my fabric, so the middle tier is slightly longer than on the pattern: maybe 2cm. The last tier might be slightly longer also since I don’t usually use 3cm for the hem. But all in all I don’t think the skirt is much longer.- the top tier was cut in one piece in the whole width of the fabric, so it’s slightly larger and has a seam only on one side.- I used french seams for all side seams. I discovered them with my teddy bear skirt and found then not that difficult and nice looking (plus they’re sturdier).- I used more elastic band that what they recommend because it didn’t feel comfy. I think I cut approximately the same size as my waist measurement.

Here is a picture where I actually where the skirt, so you can get a better idea of how it looks:

There is not much to say about the pattern, it’s very easy to make. The hardest part is gathering the different layers, because it takes quite some time. And I can’t seem to machine sew them as I’d like to. I think my stitches are too big at the beginning. But anyway it looks nice nonetheless. The skirt fits me. Maybe the fabric could be cut in bigger width to get more gathers and more puff, but it’s nice like this also.

That said, I feel like I’m not totally happy with my use of this fabric. I feel like it could have been better, I’m not as crazy and proud about this skirt as I’ve been with other things I made in the past. Maybe it seems too “normal”. I’m almost wondering “Why make this kind of skirts that is easy to buy?”. Of course I know why: I can use the fabric I want, make it in the size I want, it’s a good sewing training and I wouldn’t buy it anyway ’cause I’m not supposed to buy anything. So making it myself is nice and serves a purpose. But I don’t know… there’s something missing. That said, I really needed a “basic” skirt that would be okay to wear anywhere and wouldn’t be hard to cycle with (since I go everywhere by bycicle). I guess I’ll see in the future if she grows on me. And despite what I’m saying it’s really nice for summer, I’m always wearing it since I made it. ^^; Plus my husband really likes it!

I’m thinking of making a cute little white top to go with it (or several…). I’m sure it would look great, because there are some bright white motifs on the skirt. Maybe the C pattern from the Stylish Dress Book +alpha book? And I still have some of the same fabric I used for this skirt, I’m trying to find the perfect thing to make with it. Any suggestion?

PS: sorry for the bad pictures, it’s very cloudy here today…

Thought of the day

~~~~~~~~~~~~~~~~~~~~~~~~~~~~~~~~~~~~~~~~~

Frills are very pretty, but they’re also a pain to make!!

~~~~~~~~~~~~~~~~~~~~~~~~~~~~~~~~~~~~~~~~~

As you can guess my skirt is getting made, more slowly than what I’d like but I’m getting there. It seems it decided to be cute, I’m reassured. ^^ And while making it I got a nice idea for a mini skirt (but not for this time). I wanted to finish it today but an evening with friends yesterday and the heat have decided otherwise. I still have to add the waist band. Or, I “only” have to add the waist band. I’m getting close!

Sorry no picture, it’s very late and I’m going to bed.

Bear skirt

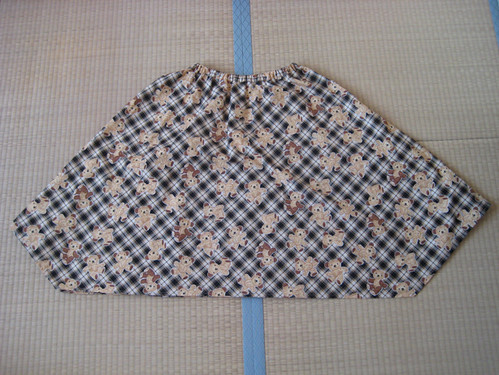
I should show more completed creations here, so that people don’t think that I just have a big mess of work in progress projects. I also happen to finish some of them sometimes! I still don’t have any real good picture of my flower dress to share with you, so I’ll show you something a little older : my teddybear skirt, named after the fabric I used.

The pattern comes from a japanese book. I don’t have it so I’m not sure which one it is. Might be this one. The clothes is this book are quite classic ones, and didn’t really interest me, except for this skirt. She was almost exactly what I’ve been wanting to make for some time! Long, but not too much wide, with corners at the bottom (see the picture bellow to understand). It looked really nice. And the pattern is really simple since it’s based on a half circle skirt with an elastic waist.

I fell in love with this fabric the first time I saw it. I love tartan/check fabrics. So when I went back to the shop later, after have discovered the pattern, and saw it again, I knew it would be perfect for the skirt! And I was right! I was happy to have an excuse to get it. ;p I love the mix of check and teddybear prints, with the elegant shape of the skirt. It might sound strange, but it definitely works! The fabric is not so thin but flowing, perfect for this skirt. It’s so light that sometimes I have the disturbing feeling that I’m not wearing anything… ^^;

The above picture was taken the first day I wore this skirt, when we went to Design Festa. The event was my motivation to make it. It looks really great with a fitted black top (to emphasize the waist and accentuate the retro feeling of the skirt) and those autumn colored tights.

In conclusion: this is a great pattern! Quick and very easy to make, for a result that is very comfortable to wear and looks pretty. My husband loves this skirt which he finds very feminine and elegant, and I totally agree. I think it will have little sisters (a skirt is a “she” in French).

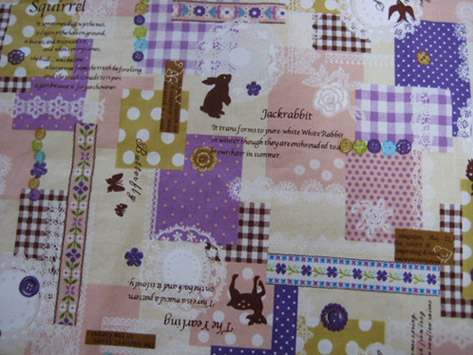
Cute fabric

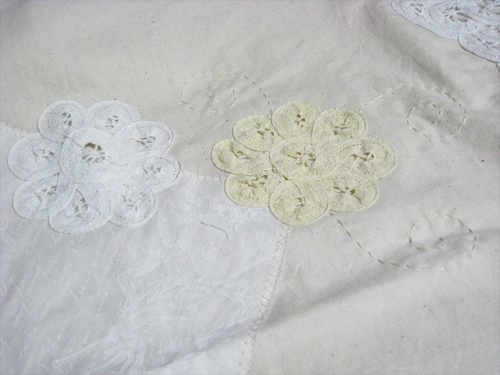
I bought this adorable fabric during my crazy week of meetings and fabric shops hunting last June.When I saw it I immediatly fell in love. It begged me to be brought home. I decided I would make a cute skirt out of it. Something simple. I didn’t have the exact image in mind, but I knew I wanted to make a skirt. Problem: once I got home I still couldn’t get a precise idea of which skirt… :s And I started to hesitate and wonder if a skirt was the best idea, of if I should make something else. I finaly settle on a skirt again, and changed my mind like three times. I cut a first panel, tried something, thought it wouldn’t look so nice, changed my mind, cut again. Now my decision is taken, there are too many panels cut to change my mind again. Let’s hope it will end up really pretty (and not just “okay”, which would be a shame with such a cute fabric).