50′s dress: photos

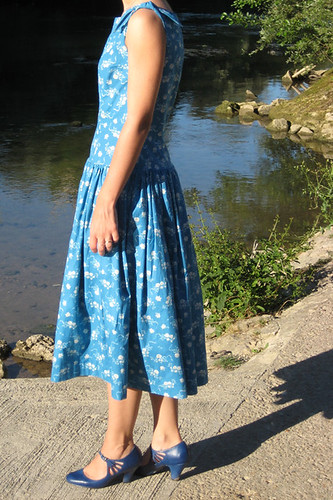
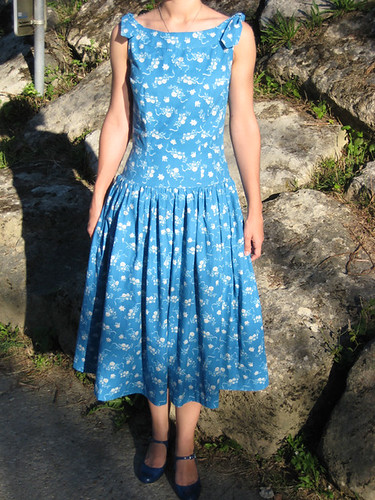
Here are the pictures! ^^ We did a little photoshoot last Sunday.

This dress was quite a challenge! First, because I had a firm deadline for it. That’s not a good idea. When you start you’re very confident, thinking you have plenty of time, and then things happen, you realize you have to make a lot of alterations to the pattern, and suddenly you’re late. Because the bad joke was that the pattern is too big! Seems it’s not my size after all. I see several possible reasons: converting my measurements from cms to inches, matching with the closest (but not exact) measurements on the pattern sheet, choosing a vintage pattern rather than a modern one… And now the result is here: it’s too big, and I got several patterns in the same size! Gertie wrote a post on finding the good vintage pattern size (which I saw afterwards…), in which she suggests you use your high bust measurement and not your regular bust measurement. Anyway next time I’ll order one size smaller!

So in the end a lot of changes had to be made: I took in a few cms in the middle of the back and front pieces, at the sides, at the shoulder seams of the yoke… Because of that I had to redraw the armhole, and with no notions of pattern altering it was a little scary. I made a musling of the Simplicity pattern (top of the dress), which seemed okay, but in the end I find that my dress is a tad too big. The waist and hips could be more fitted. I wonder if I did something wrong or if the fit could have been changed by adding the skirt. I saw in another vintage pattern (for a real dress) that they add a grosgrain ribbon as a waist stay, I’ll try that and see if it’s better. Another alteration I did was to change slightly the placement of the side zipper: it’s supposed to be at the bottom of the blouse, but for a dress I thought it would be better to have it at the top, just under the arm. The last thing that happened, which I hadn’t planned, was with the armhole. They say to finish it with bias tape, but it was just impossible for me! I couldn’t turn it around. I had to draw and add shaped facings instead.

Now let’s talk about the good things! I’m really happy I made this dress. And doing this lead to many first times:- first 50′s dress (and first garment made from a vintage pattern!)- first invisible hem (done with my sewing machine)- first lapped zipper done with my sewing machine- first close-fitting garment (and first time sewing darts)- first gathers done with my sewing machine. I didn’t use a gathering foot to make the whole gathers by machine, but I basted the gathering threads by machine. It was quicker and the gathers are more regular than when I do it by hand!I even used my sewing books four times: for the armhole facings (to do them perfectly), for the zipper, for the invisible hem and for machine gathering. It’s nice to feel you’re making progress.

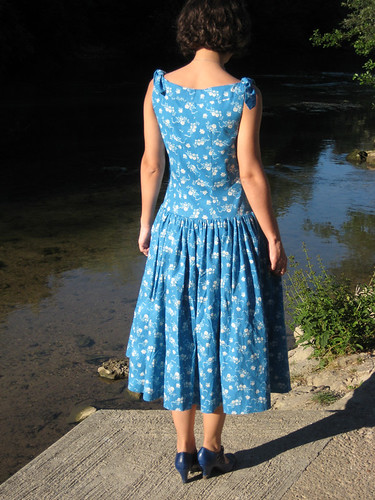
50′s dress

I’m back! Many things happened after my last post that prevented me from sewing as much as I wanted and bloging. Some nice things, like birthdays or friends visiting, and some not as nice, like a cold and headaches (I’ll let you decide where “working late” belongs). But in the end my last project was completed, on time for the wedding it was intended for, which was last Saturday.

I don’t have nice pictures of the dress on me yet, so this is the only picture you’ll get for now. My challenge was to make a pretty dress from the 50′s. I had decided that for this wedding I’d make my dress myself. And since it had to be nice and elegant (I lile to be dressed up for weddings, in honor of the bride and groom and to make it a special day), I logically turned to the 50′s. To me women clothing of that decade is the most elegant and feminin.

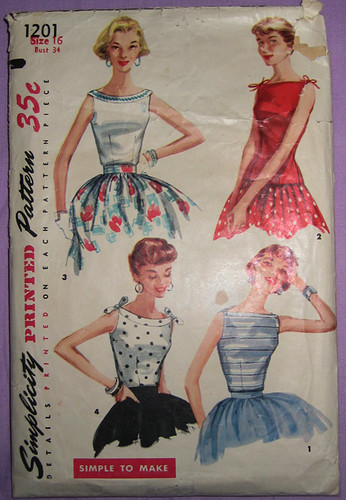
For this dress I used view 4 of the pattern shown in my last post, which is actually a blouse pattern. It’s Simplicity 1201. I’ve had my eyes on it for some time, I like its fitted shape and the different necklines. All variations are really nice. When I found it for sale in what seemed to be my size while I was looking for my dress pattern, I decided to get it and transform it into a dress by adding a skirt.

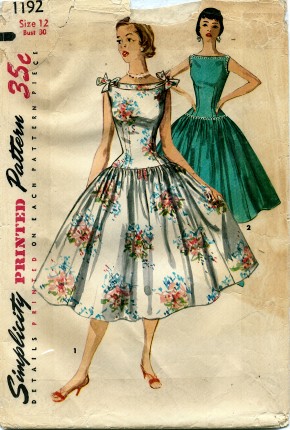
A few days later while browsing through the pattern pics I saved on my computer I realised there actually was a pattern that was exactly what I wanted to make (picture from the Vintage Pattern Wiki):

I did a little research online to try to get more information. Camelia Crinoline has this pattern and made the dress, you can find it here. She very kindly answered my questions about the fabrics and measurements.

After that the challenge was to find the right fabric. I was one of the two bridemaids and we wanted to match as well as look ok with the bride without wearing the same color as her (navy). Turns out it’s really not easy to find a nice blue fabric that is not navy, baby blue or turquoize. I finally found this one in Dunkirk, and I’m really happy with it.

I hope to show you more pictures later, along with construction details. In the meantime, if you’re interested in vintage clothes you can go check Sew Retro. It’s a collective blog about vintage sewing.

WIP: current challenge

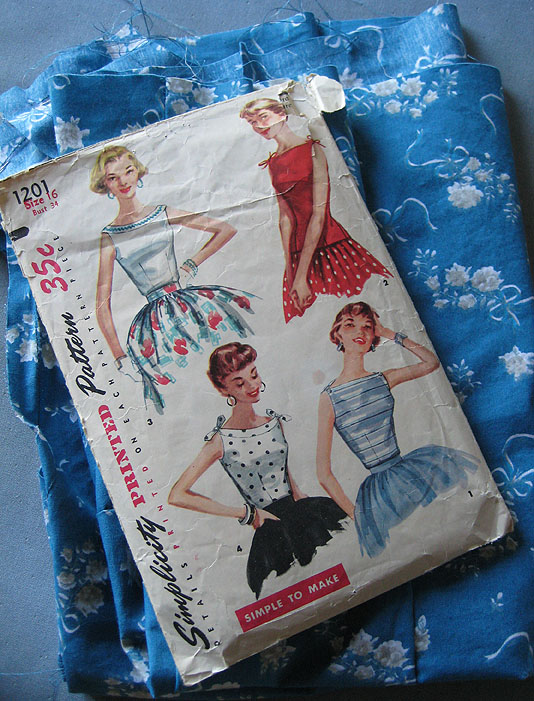
A small glimpse of my current project, started last week-end. The project starts with these pattern and fabric, but is supposed to look slightly different in the end. That is, if I’m able to master this pattern… My muslin is in serious need of adjustments, and I have no experience in pattern alteration, especially when there are darts involved.

Cross your fingers for me!

Tutorial: hairband

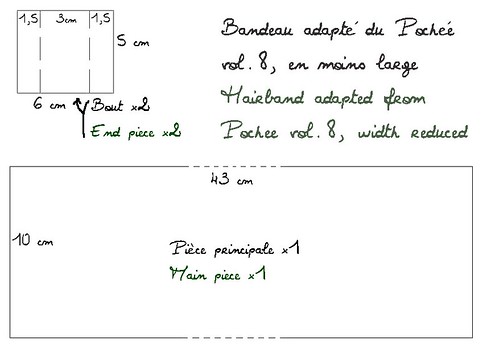
Here is the tutorial for this hairband. It’s adapted from the Pochee vol.8 one, I reduced the width. Since I didn’t make it really by myself I wasn’t sure I’d post the tutorial. But I decided to do it anyway for the following reasons:1. It’s far from being the main project of the book. I doubt anyone would buy it because of this pattern only (that said, I really recommend it ’cause it’s full of great pieces!)2. the cooking blogs often share recipes taken from books, sometimes with their own variations, sometimes as is. Crafting is a little like cooking, so why wouldn’t we do the same?My point is not of course to make the book useless, as you would have guessed. But this is a simple project that I thought could be useful and I wanted to share my version of it. I’m only showing my own images here, not images from the book.

You will need enough fabric to cut the pieces shown above. You’ll also need elastic band for the back to the hairband. I used two pieces of 3,5mm x 10cm. You’ll also need what you want to use for embellishment.

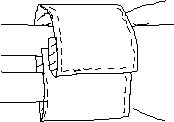
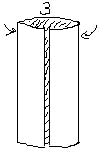
Assembly:- take the main piece, fold it wrong side out, sew the open side (about 1cm from the edge).nullTurn right side out and iron on.- for the end pieces: turn the sides toward the center, right side out. You should obtain a piece that is 3cm by 5cm. Iron on to mark folds.- Here you fold the ends of the main piece so that it’s the final size (1,25cm):
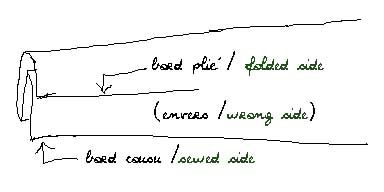
- Then it’s the part that I found the most difficult: sew everything together.The elastic band had a tendency to go away so I started by sewing the end pieces to the main piece and then sewed the elastic bands to the end pieces. The end pieces are folded like that:

About embellishments:I’m not detailing the way to add embellishments here, but you can of course add anything on the band. Most of the embellishments (adding lace, fabric, embroidery…) are best to be put before sewing anything, otherwise you might see the stitches on the back of the hairband. In my case, the bigger yo-yo is wider than the band, so I couldn’t add it before sewing the band. I hand sewn the yo-yo in the case, carefully, so that no stitch would be seen on the back.

Note: you can also cut the main part as two 6x43cm pieces. Then you put them right side on right side and sew each long side. Then you turn them right side out and keep on as above. It might be easier to add embellishments to one side.

Let me know what you think about it or if you have questions.

Pretty shoes and a tiny bit of sewing

Here it is, the age of weddings has started for us! It’s funny how it all seems to happen suddenly. One day you’re quietly living your life, and the next day you’re surrounded by happy news: engagements, weddings, friends getting pregnant, babies… So last week we went for the first time to a friends’ wedding.

Of course I needed a nice dress for the occasion (sadly I didn’t have time to make one), and a nice pair of shoes to go with it. Which gave me the excuse to get those pretties, that had been tempting me for months:

I love their colour!! At first I was thinking of getting black shoes. But I just couldn’t get them in “boring” black when they existed in such a nice shade of blue. So in the end I got the outfit below (I took this picture the day after the wedding so my dress has wrinkles).

But when I tried on my outfit before the wedding, I realized it was missing some blue color at the top. Since I couldn’t improvise a last minute trip to the store, and couldn’t sew a bolero or stole, especially without the proper blue fabric, I decided to make a necklace. I’m really lacking some more blue accessories!

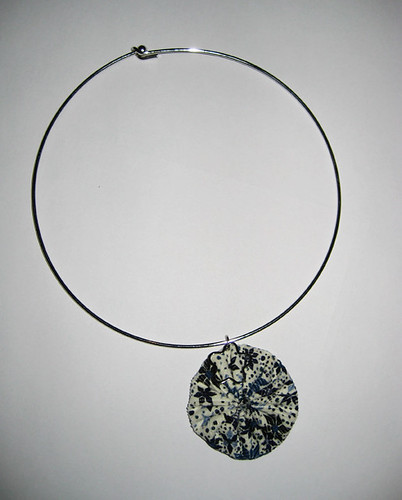
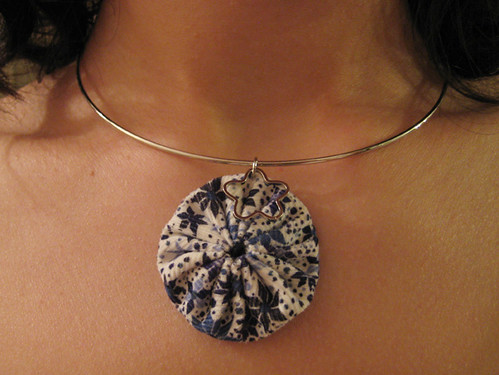
Here is what I improvised:

The yo-yo is made in blue Menasse Liberty cord. It was the only thing I had that could match my shoes and bag! It was a little hard to cut into this fabric, which was a gift from a friend who lived in London (bought at Shaukat), and which I’ve been saving since for the perfect project (I’m sure you do this too!). But at least now I can tell her that I made something with it!

For those who don’t know Liberty fabrics by heart, this is what it looks like:

The funny thing is that in the end I wore another necklace, that my mother lend me. She and my sister thought it looked better with the outfit and my husband thought it was more elegant… But I’m sure I’ll find other occasions to wear a blue necklace! Here is a picture of it worn:

I’m not sure if I’m going to leave it as is, or if I’m going to change it into a long necklace that I might use more often. We’ll see!

Nice discovery

I’m happy, tonight after going to the post office near my job (I work in Paris) I made a nice discovery: there is a Toto shop in the neighborhood!! “Toto” is a chain of fabric shops in France. ^_^ How good is that: fabric that is not very expensive, within 15 minutes of my job, in a shop that closes at 7pm and stays open at lunch time (which means I might have a chance to actually go there during opening hours!).

I learned since I started working that sadly working in Paris doesn’t mean you have easier access to the interesting fabric shops there. Those I’d like to go to close early, and it takes at least 30 minutes by subway to go there from where I work. I had no chance to go since March! That’s why I’m so glad I discovered this shop. But I’m not going to spend all my time and money there, I’ll be reasonable. I was tonight: I had to go home early so I didn’t even enter the place! ^^;

Stay tuned for a wedding party outfit and very small related sewing. And I’d like to post a tutorial for the headband I showed the other day.

Accessory

As you can see, I don’t have much free time lately… The new life I started in France is very time consuming. So when I finally got a few hours to spend sewing, I decided to do something quick and simple: something with instant gratification. I decided to make something pretty for my hair: a headband adapted from the Pochee magazine (vol.8).

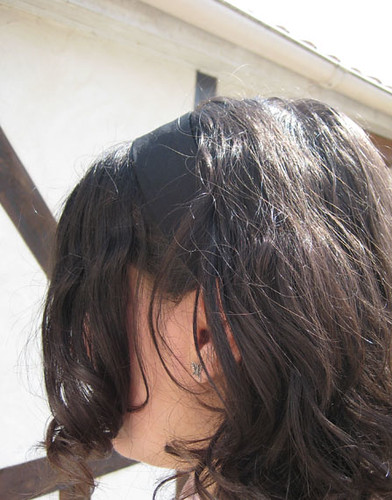
(not easy to photograph a black headband on dark hair…)

I reduced the size because I now have shorter hair and wasn’t sure a very large one would fit me. I had lots of embellishment ideas, but in the end I went for something that would be easy to coordinate. I added two black yo-yos made in the same fabric as the main part.

And now that I know it fits me I can make other versions, changing fabric and adding other embellishements! Which is great, because with shorter hair I don’t have that many hairdo options (I miss my long hair sometimes).

Happy note

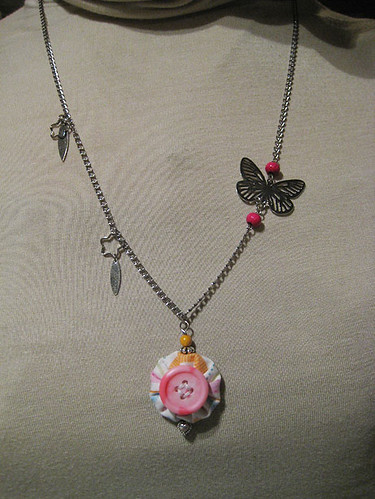
My yo-yo set for the charity sale sold this afternoon! ^_^ I’m happy because it brought money to the association and it means someone I don’t know liked it and wanted it for herself. It’s the first time I sell something made for humans (as opposed to dolls). You might see other jewelry pieces in the near future: making accessories requires less space and is easier for me to do at the moment, and I really enjoy it!

Mentalist & Liberty

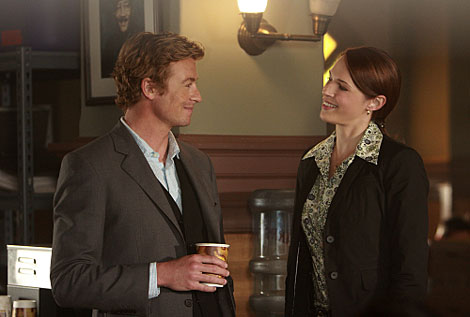
Here is a picture to confirm what I wrote about the other day. Sorry I didn’t think of looking for a picture the day I wrote the post (I’m going to edit it right away).

Looking at it I understand why I recognised it so easily: this Liberty is called Lauren and is one of the first Liberty print I liked and learnt to recognise. It’s so distinctive from other kind of prints, it’s easy to spot (unlike some of their more traditional floral prints).

(I found the picture on the Internet through Google, I don’t remember where it comes from)

Petite couture pour grand projet

I made this necklace and earings set for a charity sale that will take place this Saturday morning (yes it’s tomorrow at 9am, I’m just on time!). The base for this set was this lovely piece of fabric that I found in my leftovers box. The result is a joyful little piece, that I hope someone will like so as to bring money to the BikNok association.

In other news, I found a job in France! I’m really happy. I hope I find my routine quickly so that I can find more time to craft and tell you about it. ^^